
In this tutorial, we will guide you on how to configure a sitemap in your Magento Online Store. Magento comes bundled with functionality to generate a standard sitemap in XML format that contains your Product, Category and CMS page URLs. Once successfully generated, the sitemap will be used to inform search engines regarding the pages available for crawling.
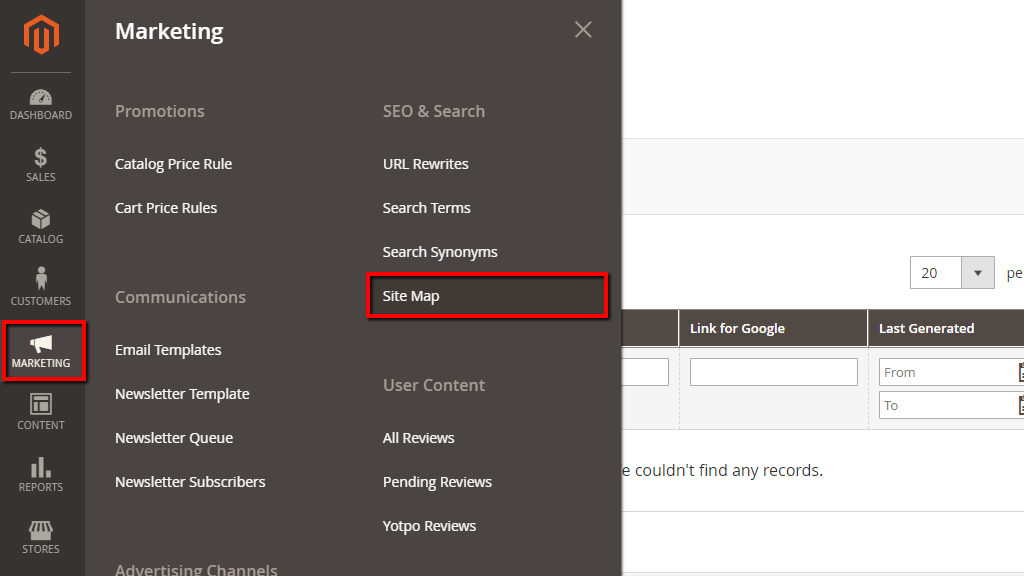
Before you step to the configuration of the sitemap settings your first job is to create the sitemap XML file. In order to begin please log in to your Magento Admin Dashboard and navigate through the left menu bar to Marketing > Site Map.
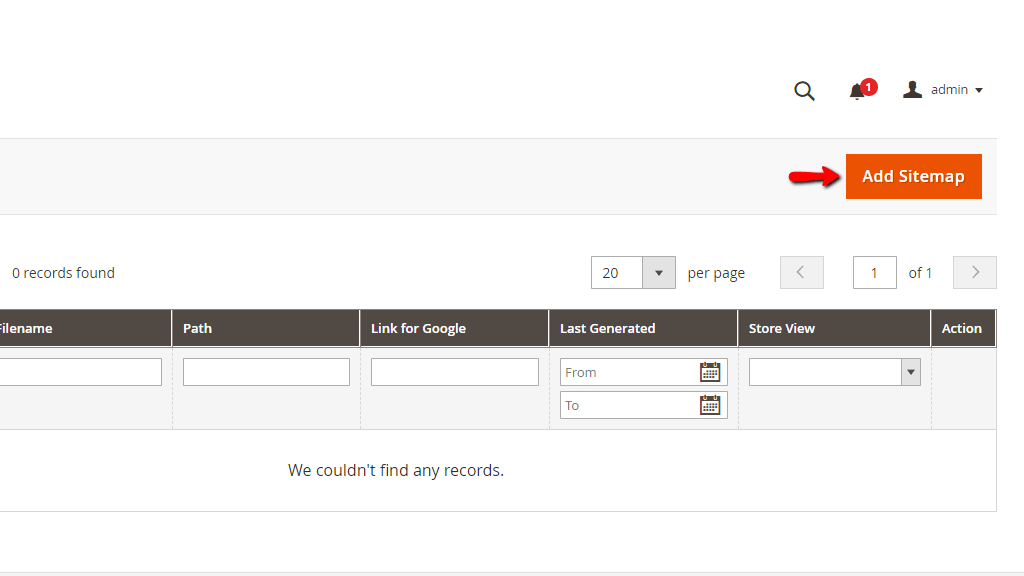
Once you access the page, please click on the “Add Sitemap” button located at the top right corner.
Then you will be presented with the “New Sitemap” page where you will need to specify only two things.
Under the “Filename” field you will need to enter the name of the sitemap file. The best practice is to go with the standard “sitemap.xml”, however, feel free to name it as you wish. In any case, please make sure to enter the .xml suffix.
Under the second “Path” name you will need to specify the directory under which you want the sitemap file to be located. Forward slash (/) stands for the root directory of your Magento installation. In case you want the file to be located in another directory, please make sure to enter the accurate path.
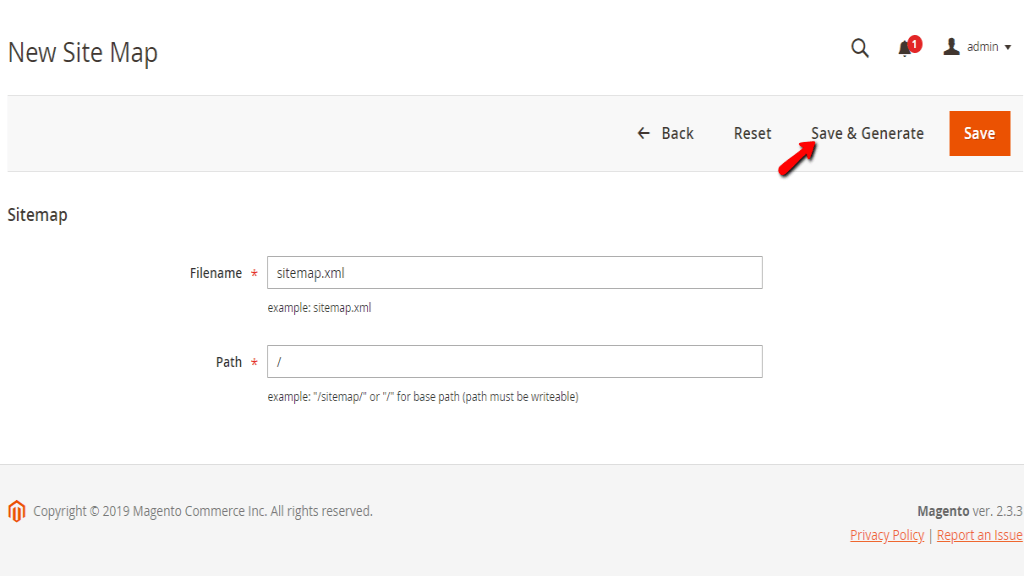
Once ready - please click on the “Save & Generate” button.
Very well! Now that you have your sitemap file successfully created you are ready to continue with the configuration of the sitemap settings.
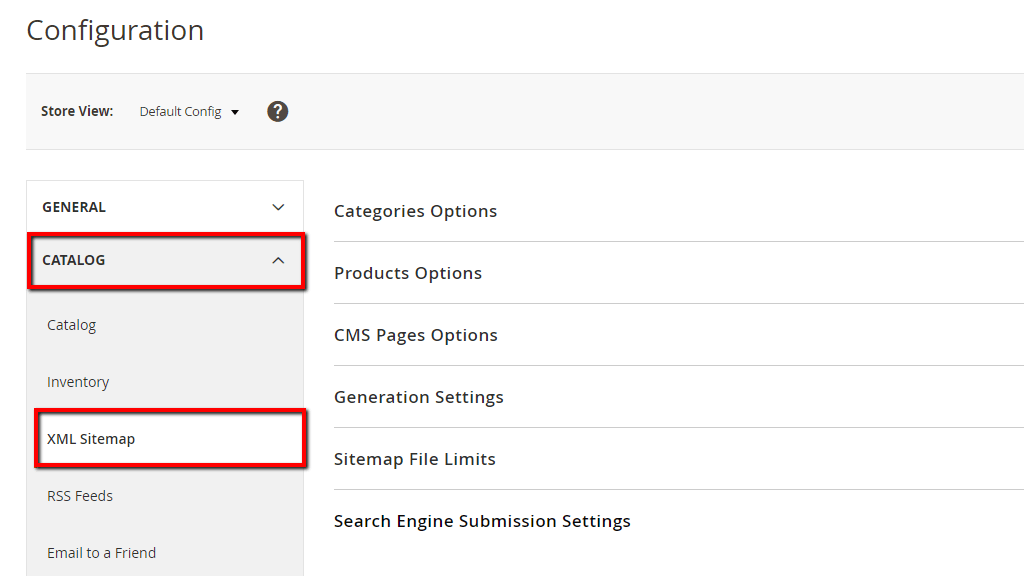
In order to configure the sitemap settings, please navigate through the left menu bar to Stores > Configuration.

Aftward, please locate the “XML Sitemap” section available under the “Catalog” tab.
From this page, you will be able to configure the sitemap settings. In order to set up your custom values, please make sure to untick the “Use system value” checkbox wherever needed.
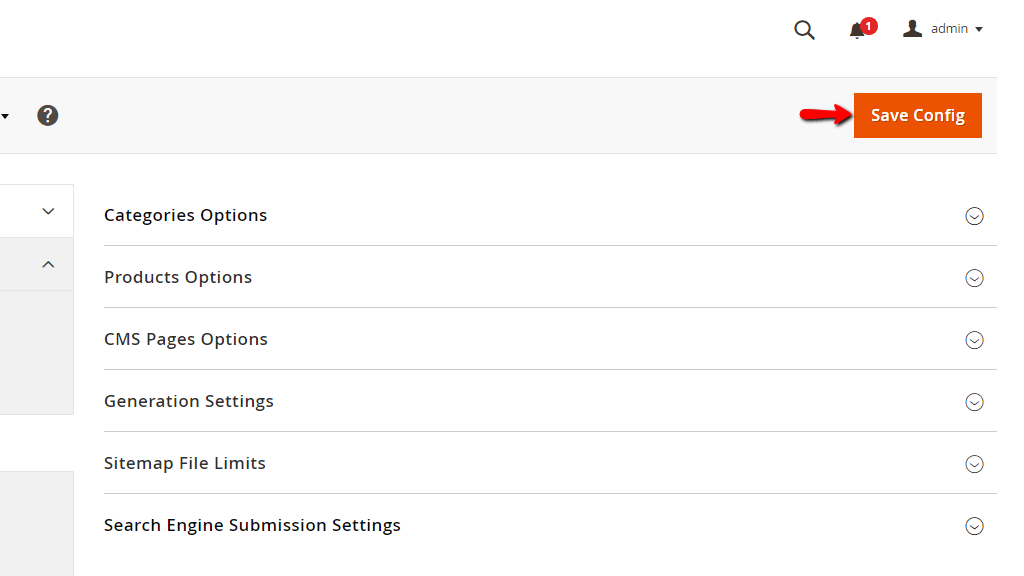
From the first three “Categories Options”, “Products Options” and “CMS Pages Options” sections you will be able to control the frequency and priority of the sitemap updates for the corresponding category of pages.
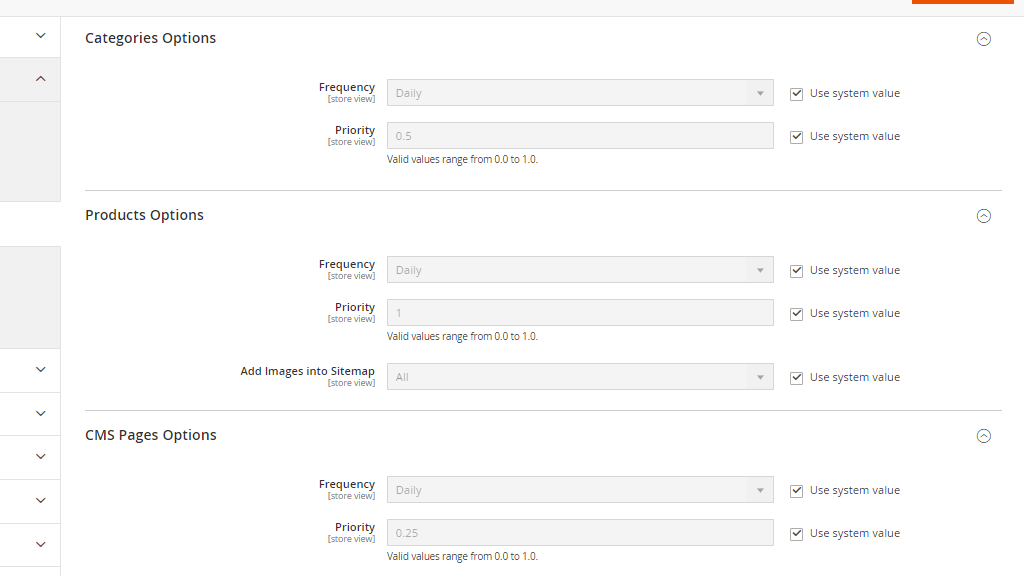
The “Frequency” setting available under each of the sections determines how often the pages related to it are being updated in your sitemap. From the dropdown menu, you can select between “Hourly”, “Daily”, “Weekly”, “Monthly”, “Yearly”, “Always” (which means the sitemap will be updated whenever a change is performed), and “Never” (which means the sitemap will not be updated for the given URLs). You can set up different values for each of the sections depending on your needs.
The “Priority” setting determines the priority of the sitemap updates for the products, categories, and CMS pages compared to the rest of the content. You can enter values between 0.0 and 1.0, where 0 have the lowest priority.
Under “Product Options” you will notice an additional “Add Images into Sitemap” setting which will allow you to determine whether product images are added into the sitemap, and if so which exactly. You can choose between “All”, “Base Only”, and “None”.
In this section, you will find the settings controlling the updates of the sitemap and you will be able to set them up depending on your personal preferences.
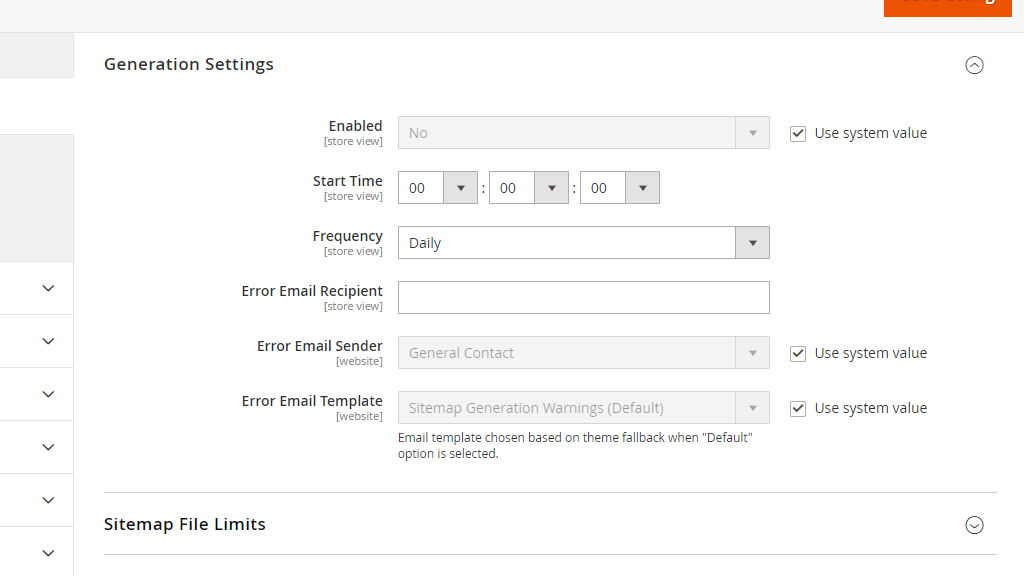
The first “Enabled” setting will let you control whether a sitemap is available on your Magneto store. In case you would like to enable the sitemap, please make sure to select “Yes” from the dropdown menu.
The following “Start Time” setting will allow you to determine the exact time of the day when the sitemap will be updated. Please, select the hour, minutes, and seconds values from the corresponding dropdown menus.
From the “Frequency” dropdown menu you can select one of the following options “Daily”, “Weekly”, and “Monthly”, which will determine how often the sitemap is being updated.
Under the “Error Email Recipient” field you can specify an email address where you would like to receive email notifications in an event of a failure with the sitemap update process.
The “Error Email Sender” determines the store contact email which will be the sender of the error email notifications. You can review your email settings by navigating to (Stores > Configuration > General tab > Store Email Addresses).
From the last “Error Email Template” dropdown menu you can select the template which will be used for the error notification emails.
In this section, you will find two settings that will allow you to control the limits of the sitemap according to the size of your website.
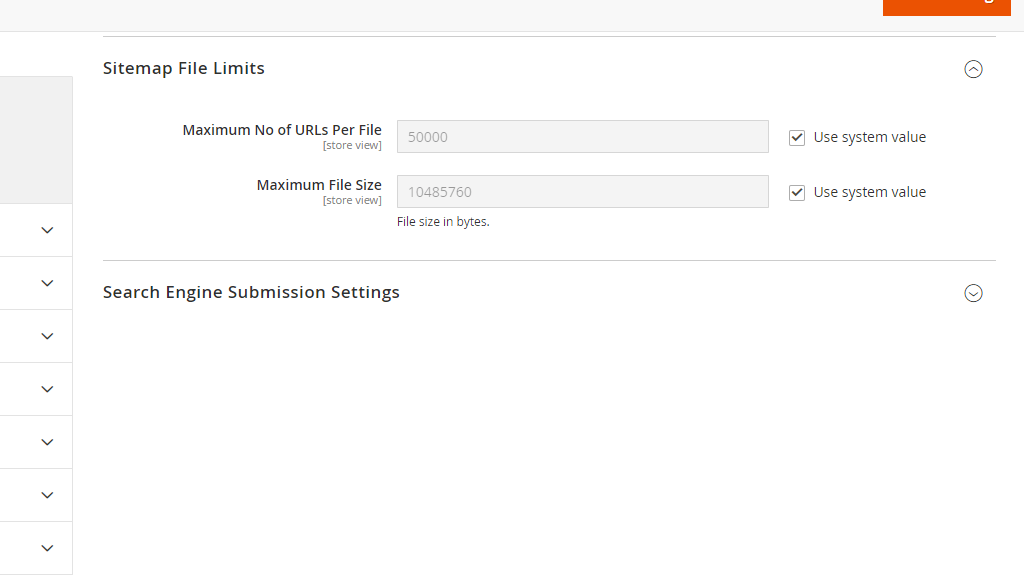
From the first “Maximum No of URLs Per File” setting you can set up a limit for the maximum number of URLs that could be included in a single sitemap.
The “Maximum File Size” setting will allow you to enter a value (in bytes) which will determine the maximum allowed size for the sitemap file.
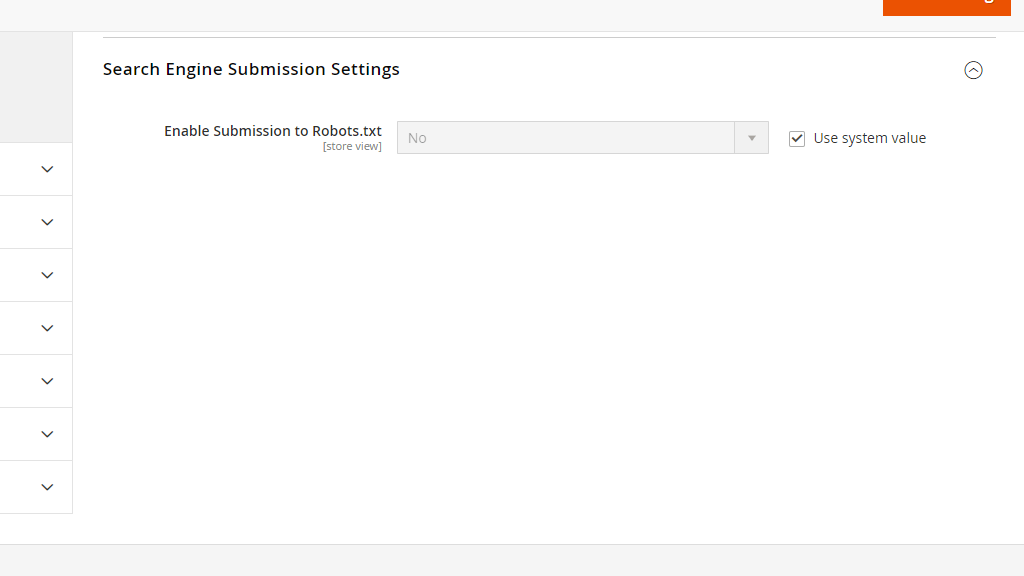
In this section, you will find only one setting which will allow you to control whether directives for the search engines that crawl your website will be submitted to the "robot.txt" file.
Once you are done, please do not forget to click on the “Save Config” button located at the top of the page.
That was it! Your sitemap is successfully created and your preferences configured. We would like to take a moment to wish you good luck with the ranking of your website and thank you for trusting our guidance. Hopefully, you have found the tutorial useful and easy to follow. If any questions arise, please do not hesitate to contact our Support Team.

Sebahat is a young and bright woman who has become an invaluable part of our team. She started as a Customer Care Representative, mastering that role and, along the way, growing into a tech-savvy individual who is well acquainted with every support layer of the company. Driven by her aim to improve our customers’ experience constantly, she is committed to enhancing the extraordinary support we deliver.
Learn more about Magento 2 in the other tutorials that we have:
