
Displaying your contact email address directly on your website pages is not recommended nowadays as you can quickly become a target for spam attacks. Therefore, configuring a Contact Form is a must. Not only are you going to reduce spam messages, but you are also going to save a lot of time and effort for the visitors who have questions or feedback they want to share.
Even though Contact Forms are way more secure, they can still become a target of various attacks. Fortunately, there is an easy-to-configure solution for protecting your Contact Form and adding an extra layer of security.
ReCAPTCHA is designed to identify humans from bots and to protect websites from spam, phishing, and hacker attacks. It uses an advanced risk analysis engine and adaptive challenges to keep automated software from connecting with abusive activities on the website.
As you might know, by default, WordPress does not include any functionality for creating and managing Contact Forms. However, thanks to Contact Form 7's reCAPTCHA integration module, you can easily block abusive form submissions. If you have not yet configured your Contact Form, please refer to our tutorial based on How to create a Contact Form in Wordpress, where you will find instructions on how to install the "Contact Form 7" plugin and how to set up your custom Contact Form.
As soon as you have the plugin installed and your form configured, you are ready to start with the first step of enabling reCAPTCHA on it.
In order to integrate Google reCAPTCHA in your Contact Form, you will need to provide the so-called "Site Key" and "Secret Key".
The required API keys need to be obtained from your Google reCAPTCHA account. In case you do not have an existing account, you can create a new one by going to google.com/recaptcha/.
Once your account is successfully created, you will have to register a new site. You can do that by clicking on the "Admin console" button located at the upper right corner of the page.
Alternatively, you can directly enter the following URL in your browser:
google.com/recaptcha/admin/create

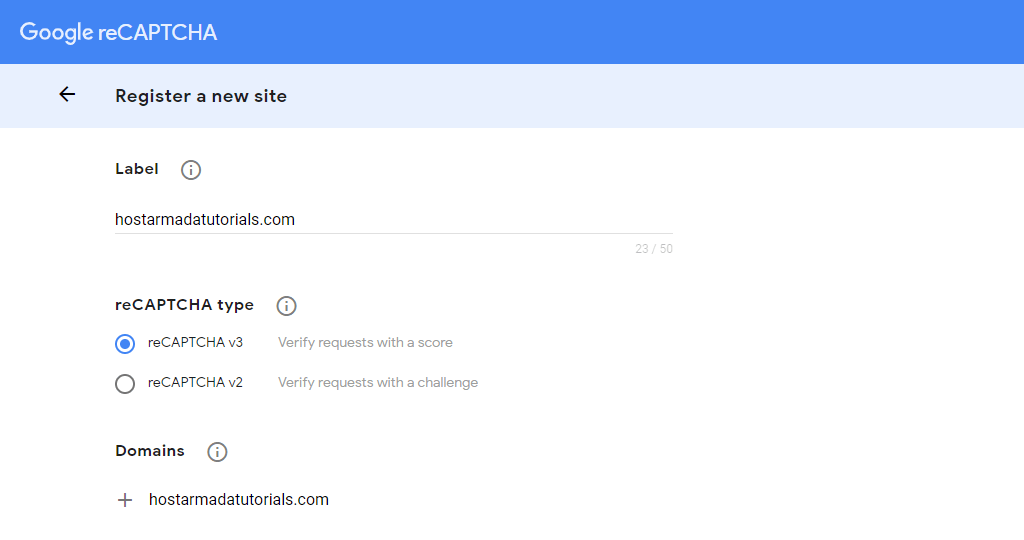
In both cases, you will be redirected to the “Google reCAPTCHA” page, where you will need to fill a simple form in order to register your new site.
Within the first "Lebel" field, you will have to enter a title, which is only for your reference and will help you quickly recognize this site in the future.
Under the second "reCAPTCHA type" section, you will find two radio buttons presenting each verification type.
Briefly explained, the reCAPTCHA v3 works on the background and does not require your visitors to take any additional actions in order to be verified. The reCAPTCHA v2, on the other hand, may require particular user interaction based on the selected type:
In case you need an in-depth explanation, please refer to Google's official documentation.
Within the following "Domains" section, you need to enter the actual domain name of your WordPress website. Note that you have to insert only the domain name, i.e., "yourdomain.com", excluding any protocol, path, or ports. If needed, you may enter more than one domain name, where each one should be placed on a separate line. Aldo, you should know that all subdomains associated with your domain name(s) will be automatically included.
Under "Owners", you will see listed your Gmail email address. If needed, you may add more people.
Next, please make sure to tick the “Accept the reCAPTCHA Terms of Services” checkbox and then click on the “SUBMIT” button.

Once this is done, you will be provided with the required “Site Key” and “Secret Key”.

The “Site Key” will be used in the HTML code that your site serves to users while the “Secret Key” will be used for communication between your site and Google only. Please, bear in mind, that you have to keep that key a secret as it is a sensible data.
Now that you have the required API keys, it is time to actually integrate Google reCAPTCHA into your Contact Form.
First, we will need you to log into your WordPress Admin Dashboard. You can do that by accessing your domain followed by "/wp-admin", i.e., "yourdomain.com/wp-admin", where "yourdomain.com" stands for your actual domain name.
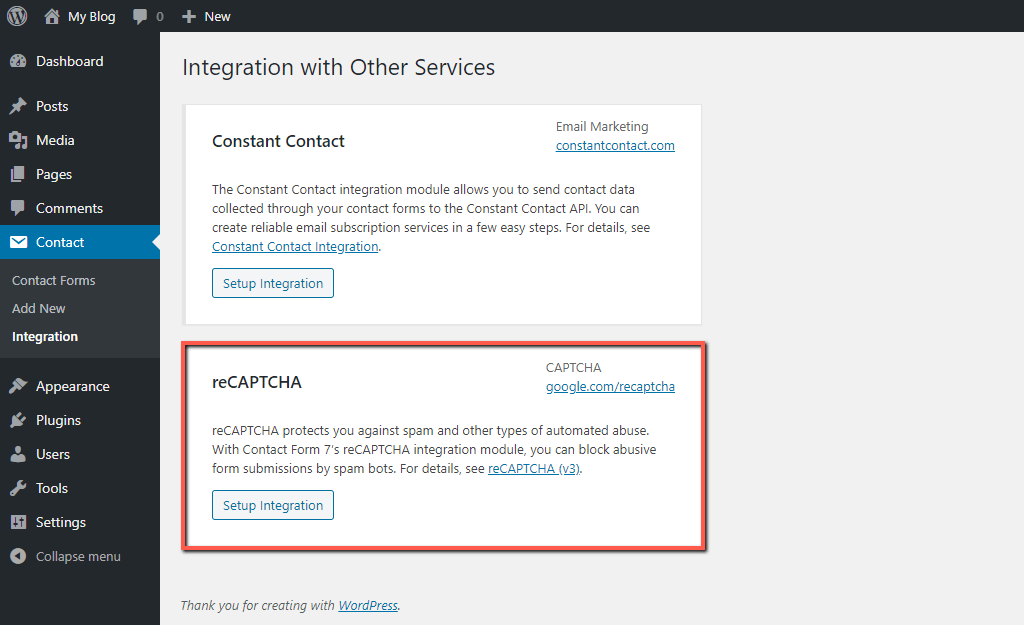
Once logged, please navigate through the left-hand side menu bar to Contact > Integration.

Upon doing that, you will be redirected to the “Integration with Other Services” page, where you will see the "reCAPTCHA" meta box. Please click on the "Setup integration" button within it.
Once this is done, you will be redirected to a new page, where you need to input the “Site Key” and the “Secret Key” into the corresponding fields.
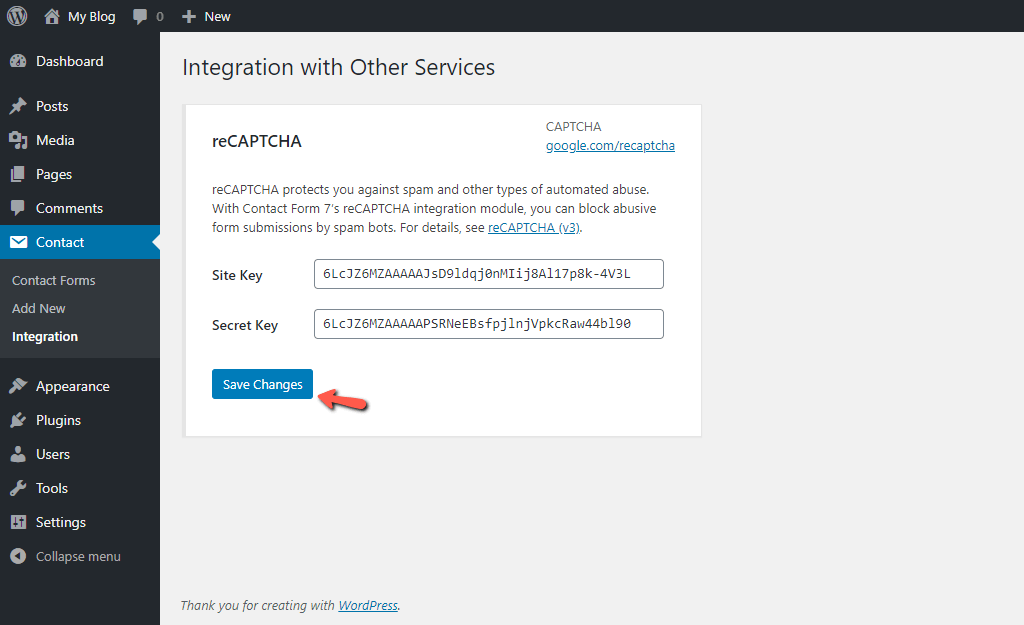
When the keys are entered, please click on the "Save Changes" button.
Now that you are done, you can double-check the website frontend in order to confirm reCAPTCHA is successfully enabled on the Contact Form.

That is it. Now, your Contact Form is protected from spambots and false submissions with reCAPTCHA.
Congratulations! In this tutorial, you have learned how to register your site in Google reCAPTCHA and how to integrate the reCAPTCHA into Contact Form 7. We hope our instructions were clear enough to understand, and you have managed to achieve the desired result.

Sebahat is a young and bright woman who has become an invaluable part of our team. She started as a Customer Care Representative, mastering that role and, along the way, growing into a tech-savvy individual who is well acquainted with every support layer of the company. Driven by her aim to improve our customers’ experience constantly, she is committed to enhancing the extraordinary support we deliver.
Learn more about Wordpress in the other tutorials that we have:
