
In this guide, our focus will be on adding and managing Magento Product Categories. Organizing your products accurately is extremely important as your visitors will be able to easily navigate through your Online Store and find exactly what they are looking for. Before we step into adding actual products, we will review the process of creating categories, as this will allow you to easily organize your products while you are adding them. Although you will be able to create categories while you are adding or editing your products, this is not really recommended as you will not be provided with the possibility to entirely customize the category.
The first step we will need you to take is to log in to your Magento Admin Dashboard and navigate through the left menu bar to Catalog > Categories.
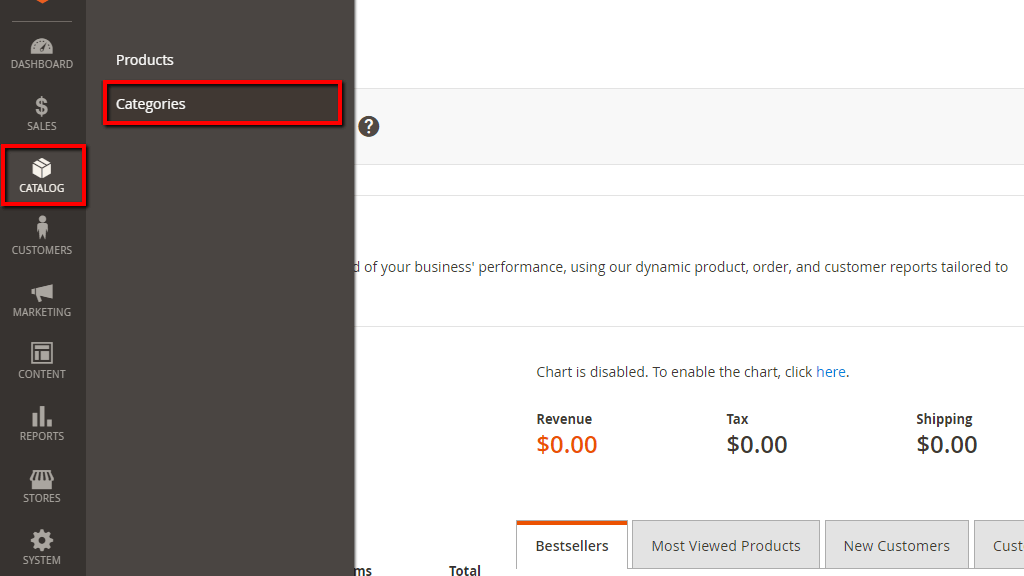
This is the page where you will see all your categories listed - you will be able to create new categories and manage your existing categories.
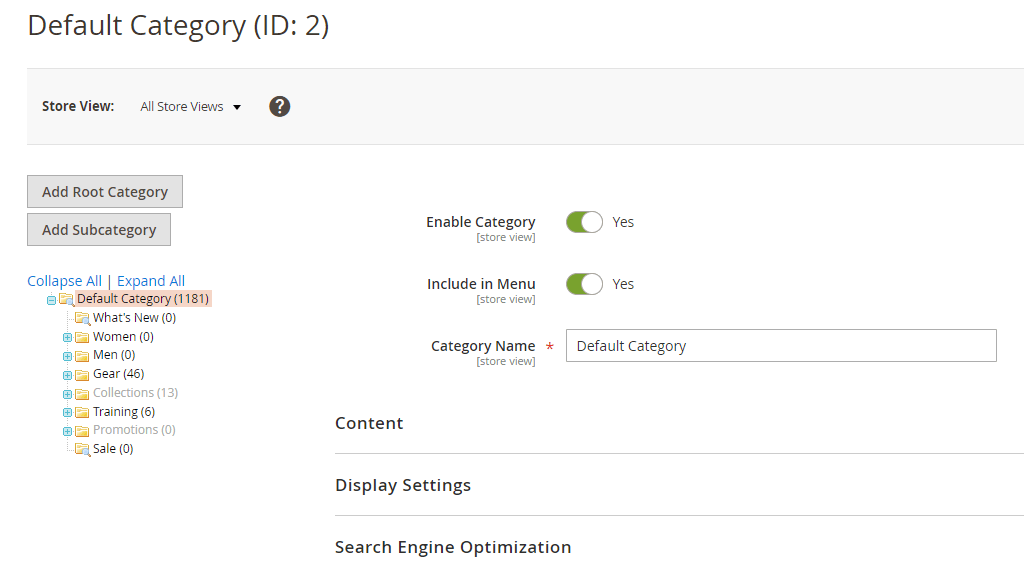
If you have installed Magento with no sample data and this is the first time you are accessing the Categories page you will not have any categories apart of the “Default Category” displayed in the left-hand side list. You will probably notice that some categories are displayed in grey - those are categories that are currently disabled.
Before we step into adding new categories we would like to take a moment to make one really important notice. The term “Root Category” could be slightly misleading and result in confusion for most users. In Magento, the term “Root Category” does NOT refer to a parent category under which you are supposed to nest subcategories. Practically the “Root Category” creates a separate category structure for each Magento website.
Another important thing we would like to point out is the difference in the process of adding parent categories and subcategories.
In order to add a parent category, please make sure to click on “Default Category” from the list. Alternatively, if your goal is to add a subcategory that should be nested under a particular parent category (e.g. “Men”), please make sure to click on the category name, either way, Magento will automatically consider the new category as a parent category. The category name under which you are currently located is listed at the top of the page, so you can always ensure you are under the correct category.
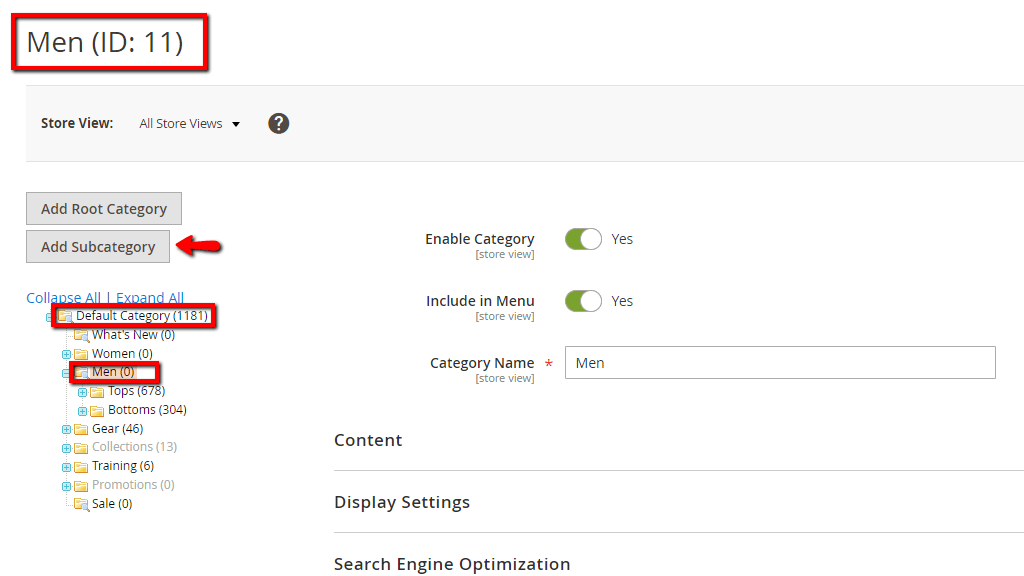
Now that we have got everything clear, please click on the “Add Subcategory” button.
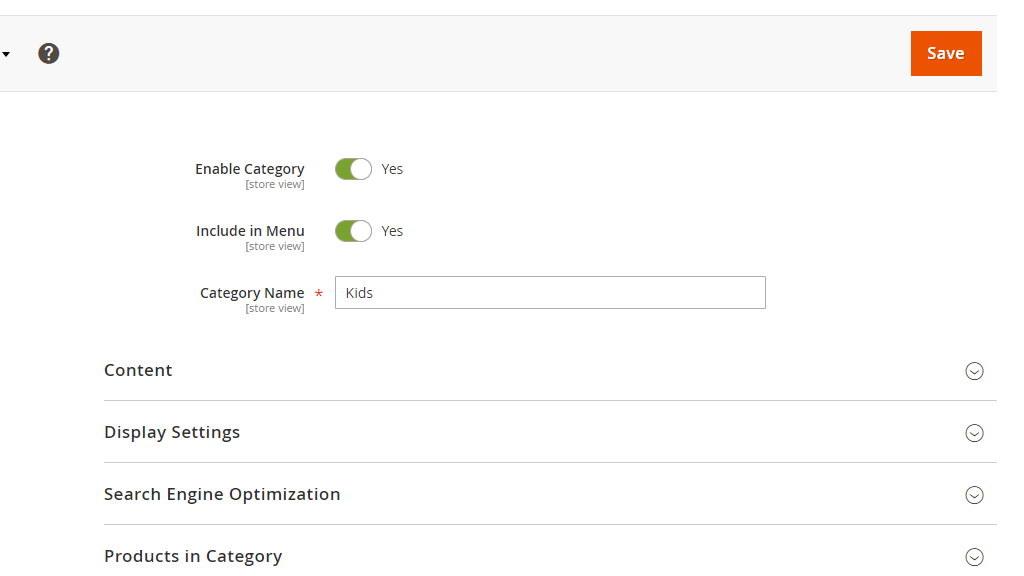
As you will see the first three settings are quite self-explanatory. The “Enable Category” button determines whether the category is enabled or disabled, the “Include in Menu” button determines whether the category will be displayed within the dropdown menu on your store’s main bar and the “Category Name” field is where you need to define the category name.
From the first “Content” section you will be able to select an image for the category and write a description if needed.

The image and the description will be displayed at the top of the page for the given category - right above the list of products included in this category. Setting an image and description is not required, it is totally up to your preferences and needs. From the “Add CMS Block” dropdown you can select premade CMS block you would like to use for the given category. Please note that this setting allows you to select an existing CMS block rather than to create a new one.
From the following “Display Settings” section you can control how the categories appear on your store’s frontend.
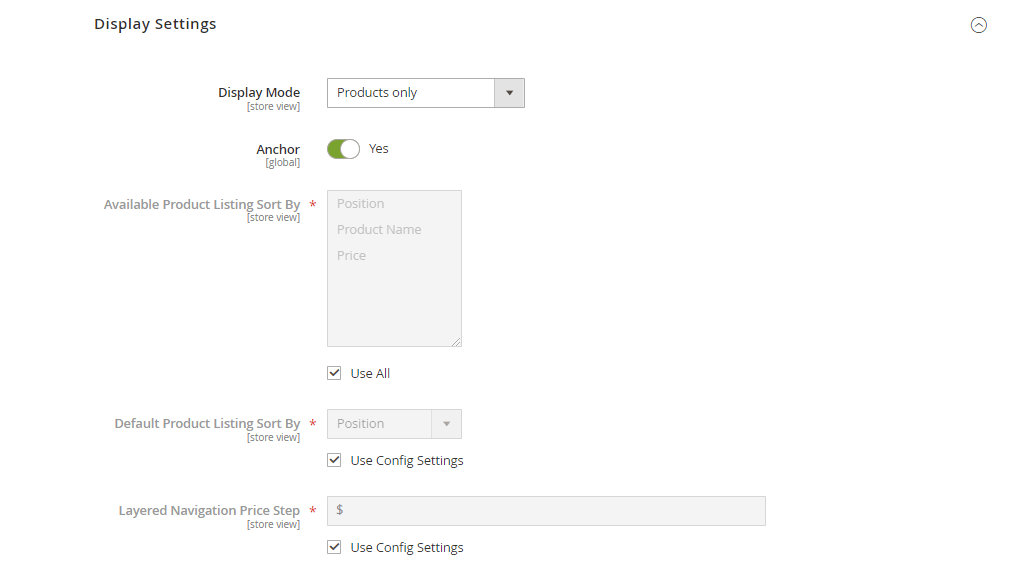
From the “Display Mode” dropdown menu you can select between “Products only” which will display all the products added under this category, “Static block only” which will display the static block you have selected in the previous “Add CMS Block” setting, or “Static block and products” which will display the static block and the products included in the category.
The next “Anchor” button will include layered navigation (usually on the left-hand side) to your catalog pages and your customers will be able to easily filter the products by attributes.
From the following “Available Product Listing Sort By” setting you can select the attributes by which products will be sorted on your store’s frontend. The sort type you select here will be displayed in a dropdown menu and your customers will be able to switch between them and sort the products in the most convenient way. By default, all types are selected, if you want to exclude any, please make sure to untick the “Use all” checkbox and mark the desired types by holding the “ctrl” key on your keyboard and clicking on them.
The “Default Product Listing Sort By” setting determines which will be the default sort method.
Under the last “Layered Navigation Price Step” you can select a custom value determining the price ranges used for the price navigation layer.
Under the following “Search Engine Optimization” section you can add the SEO metadata for the category.
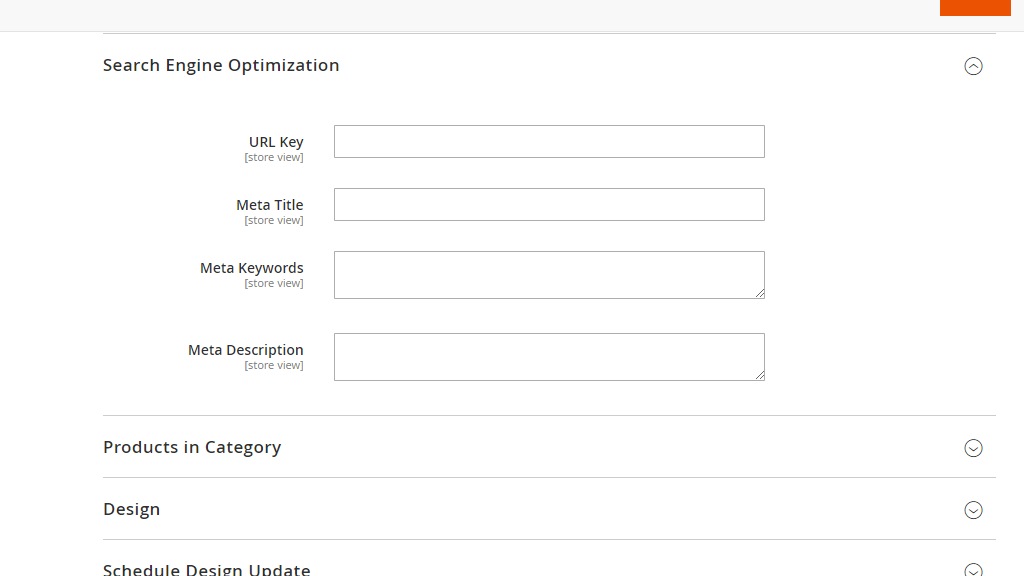
You can specify the “URL Key”, the “Meta Title”, the “Meta Keywords” and the “Meta Description”. All the data you enter here is associated only with the category, not with individual products assigned to the category.
Under the following “Products in Category” section you will find all your currently available products and you will be able to add them to the category by ticking the checkbox in front of them.
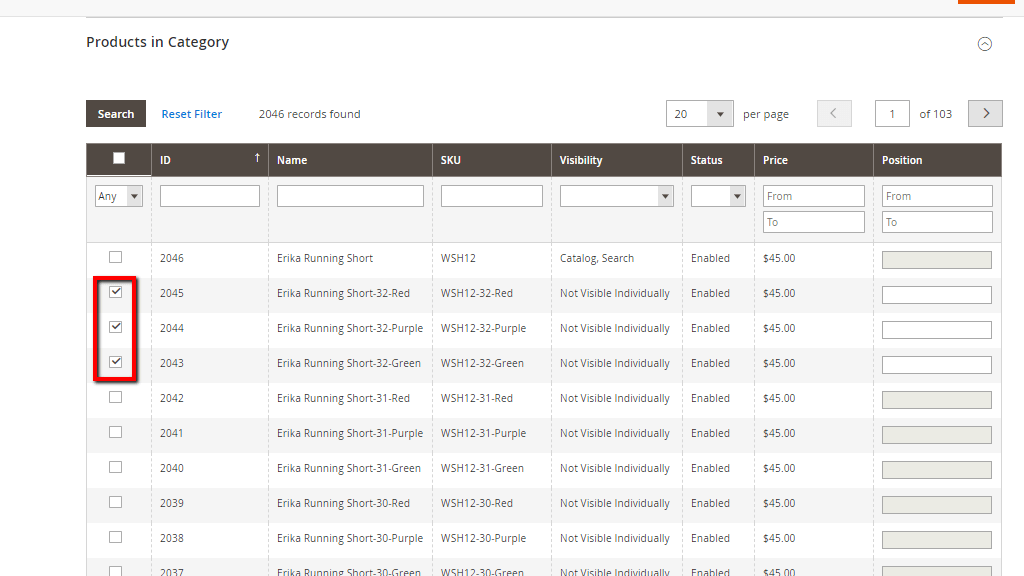
Although you will be able to assign a category directly from the product’s page, this list allows you to easily add products in bulk. We believe you will find the most convenient way for you to work it out.
From the following “Design” section you will be able to customize the design of the category page in case you want it to be different than the rest of your website.

If you enable “ Use Parent Category Settings” the rest of the settings will not be editable. Otherwise, you will be able to select a custom theme and layout for the category page, enter a layout update XML and apply the design to the products included in the category.
From the last “Schedule Design Update” section you will be able to define the exact time when the design changes should be applied.
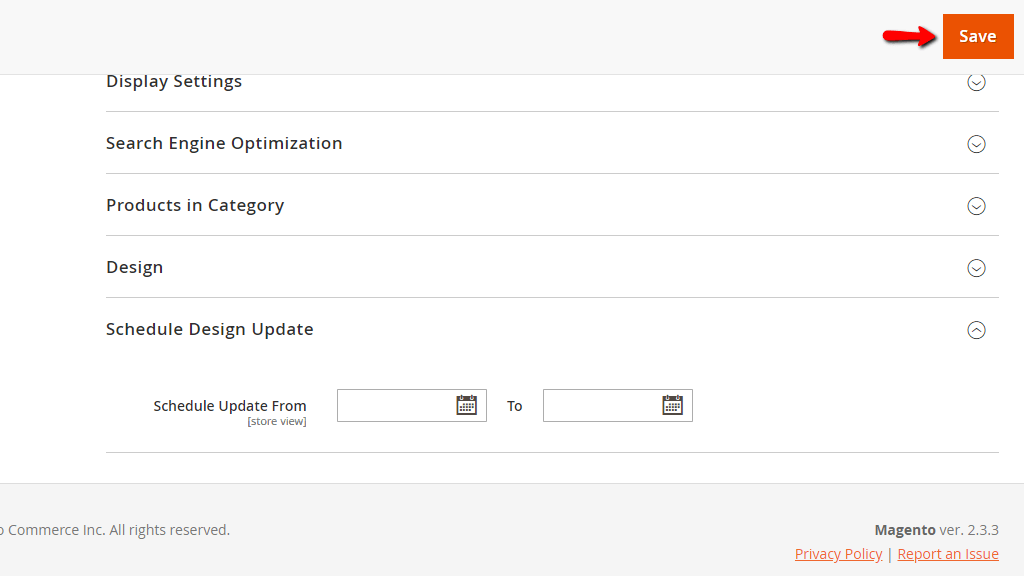
Once you are ready with the configuration of all settings, please click on the “Save” button in order to add your new category and you will see it listed in the left category structure.
Well done! At this point, you know how to add parent and subcategories in your Magento Online Store and efficiently organize your products. We hope you have found this tutorial useful and easy to follow and we would like to welcome you to contact our Support Team in case you have experienced any sort of difficulties.

Sebahat is a young and bright woman who has become an invaluable part of our team. She started as a Customer Care Representative, mastering that role and, along the way, growing into a tech-savvy individual who is well acquainted with every support layer of the company. Driven by her aim to improve our customers’ experience constantly, she is committed to enhancing the extraordinary support we deliver.
Learn more about Magento 2 in the other tutorials that we have:
