
SSH is a network protocol used to send commands, transfer files, or login securely to a remote server over the Internet, using either a Linux terminal or an SSH client such as PuTTy.
The SSH protocol requires authentication. It provides two methods so that the authentication can be achieved. The most basic method is with a username and password and the second option is authenticating via a cryptographic key pair. There are two types of keys - public and private keys. To generate these keys typically you will need access to the SSH service, however, WHM makes it easy for you by providing you with an interface where you can generate the required keys. When a key is generated, WHM will create both the public and the private keys for you. The public key is saved on the server while the private key you will need to download and then import into your SSH client or put it in the “/home/user/.ssh” directory if you are using a Linux-based operating system. When you attempt to login over the SSH protocol both the public and the private keys are compared with each other and if they match you will be able to authenticate successfully.
The main advantage of SSH over the other communication protocols is that it encrypts the communication using cryptographic keys algorithms and even if the communication is handled over an insecure network, it will still be encrypted.
Now that you know how SSH works, let's continue reviewing the "Manage root’s SSH Keys" and the “SSH Password Authorization Tweak” features of WHM.
First, you need to log into the WHM service for your VPS or Dedicated Server. If you are not sure how to do that, please check our How to access the WHM service tutorial. After you have logged in, please use the search bar on the left side of the page and type “Manage root’s SSH Keys”.
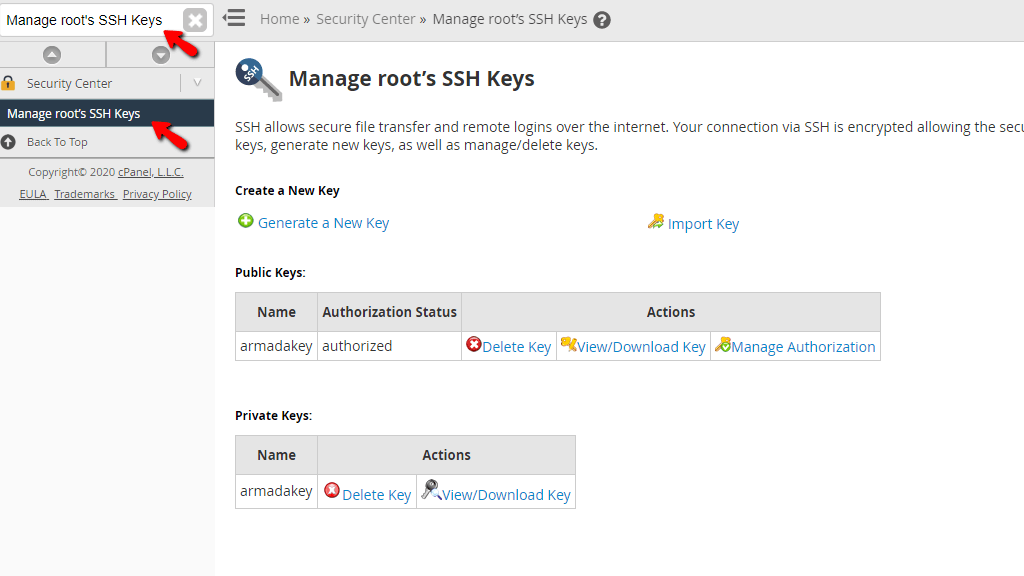
When the functionality shows up below the search bar, please click on it so you can be sent to the “Manage root’s SSH Keys” page.
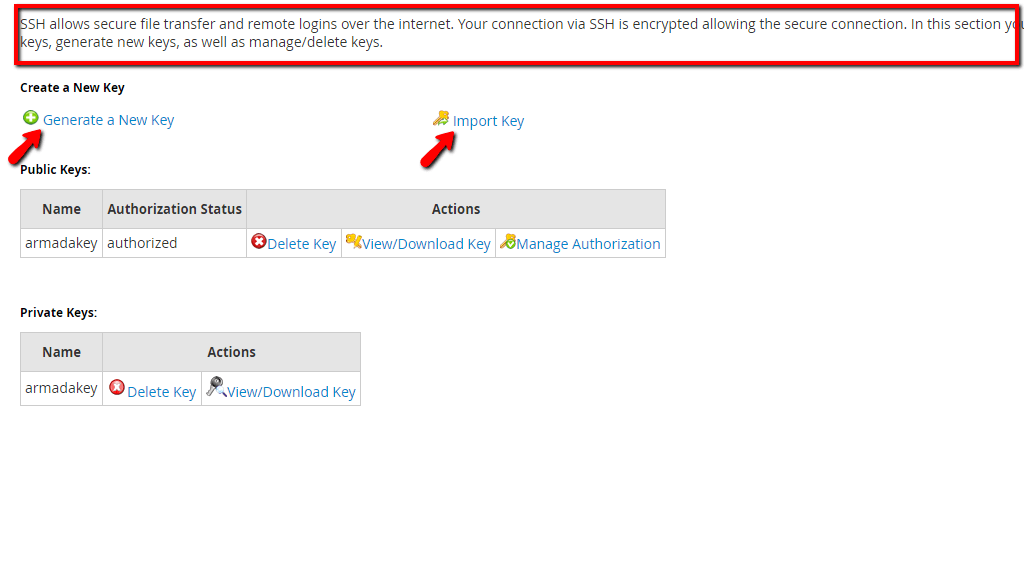
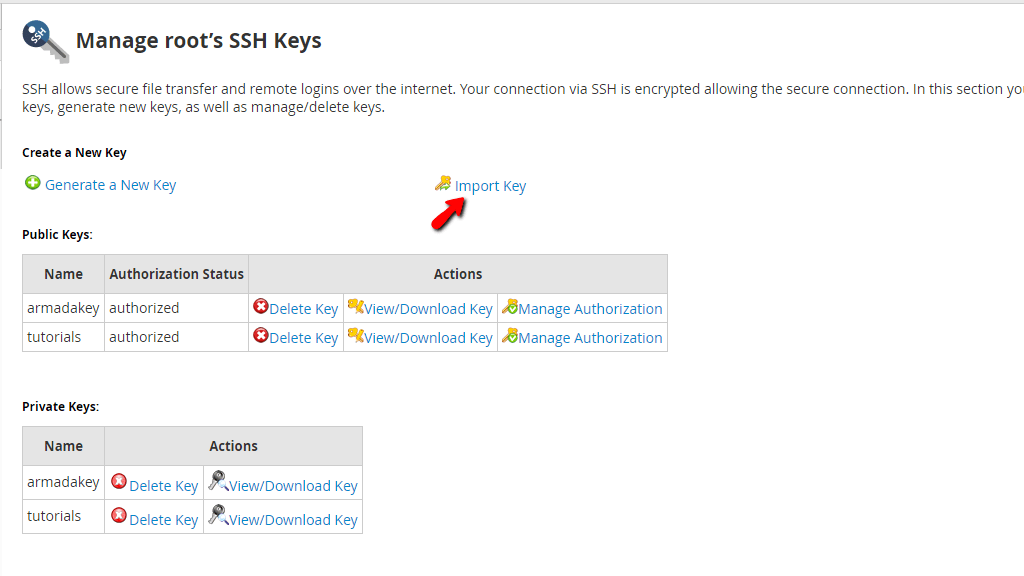
When you land on the “Manage root’s SSH Keys” page, you will notice a brief description of the SSH service on the top of the screen. Underneath, you will see the “Create a New Key” heading, and below, you will see two links - “Generate a New Key” and “Import Key”
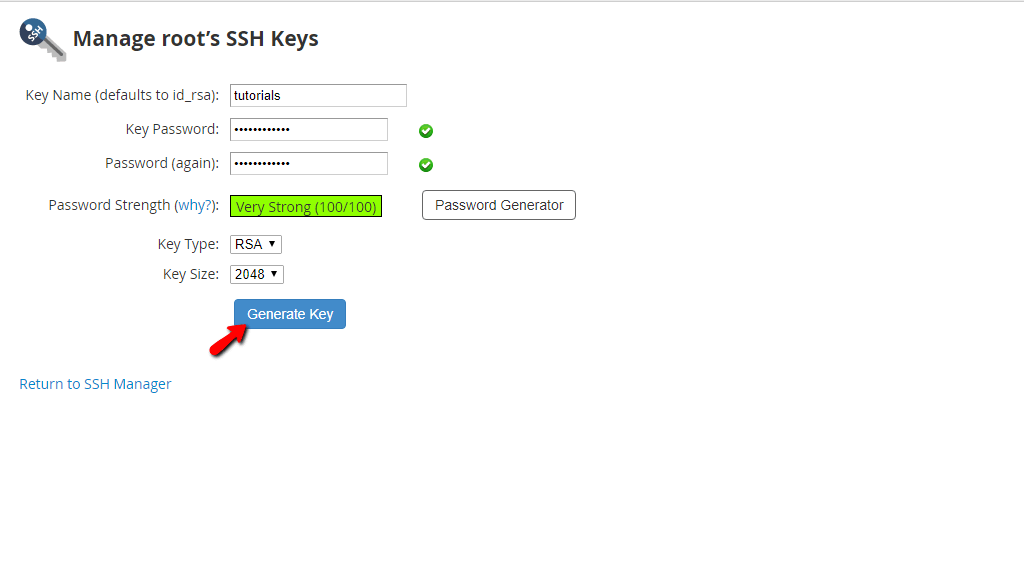
In order to generate a new key, please click on the “Generate a New Key” link so you can be redirected to the page. When you land on the “Generate a New Key” page you will be able to use the text fields and dropdown menus to create a key.
Upon entering all of the requested information, please press the “Generate Key” button located exactly below the “Key Size” dropdown menu.
When the “Generate Key” button is pressed, you will be redirected to a page notifying you that the key has been created. Below this message, you will see a “Return to SSH Manager” link. Please press it in order to go back.

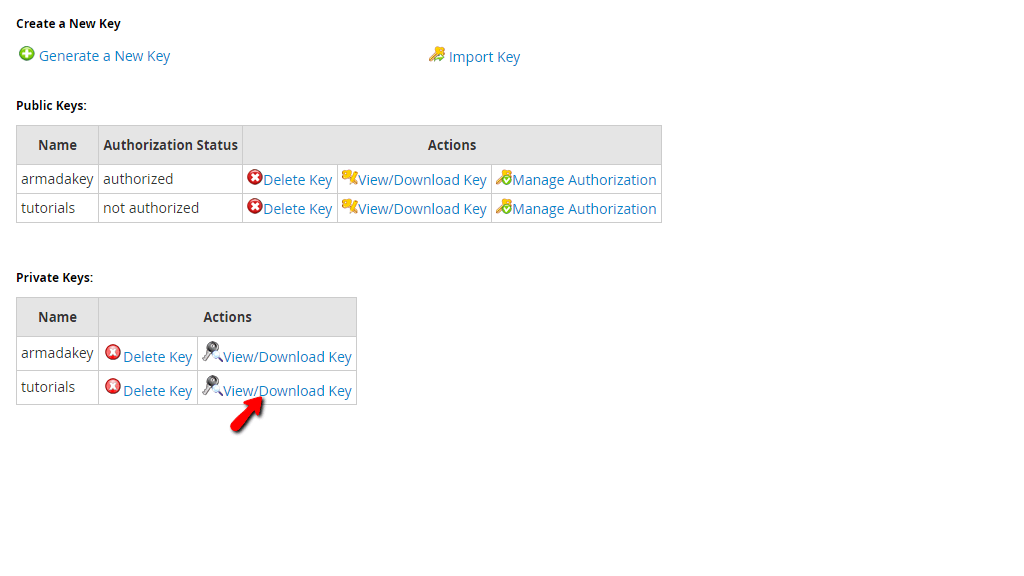
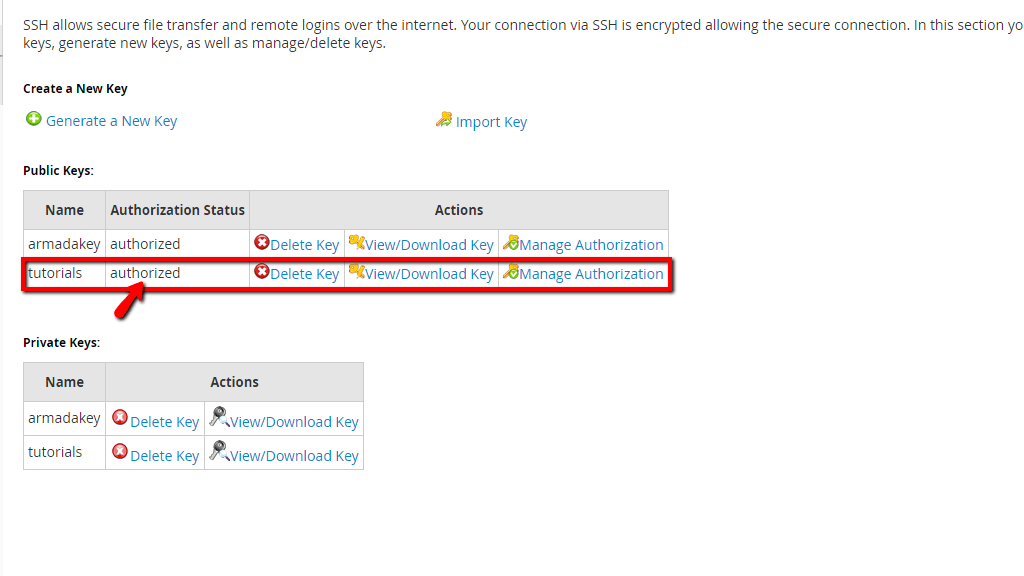
Now that you have created the key, it will be shown on the initial “Manage root’s SSH Keys” page.
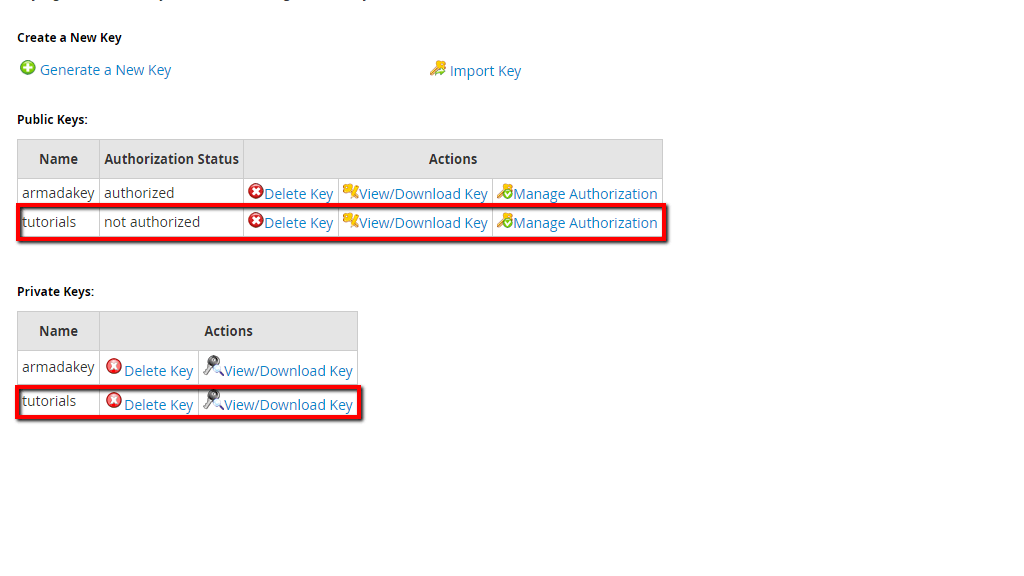
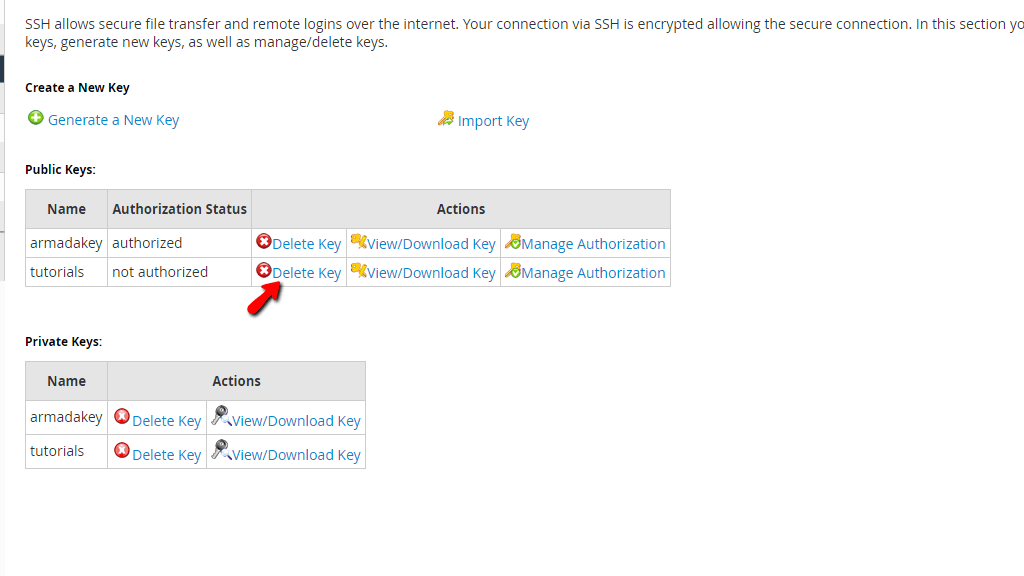
Both the public and private keys will be inside two table sections. Let’s go through these table sections as the options inside are similar for both keys with one exception.
Delete Key
This will allow you to delete the key and completely remove it from your server. If you want to do that, please click on the “Delete Key” link within the row of the key you want to remove.
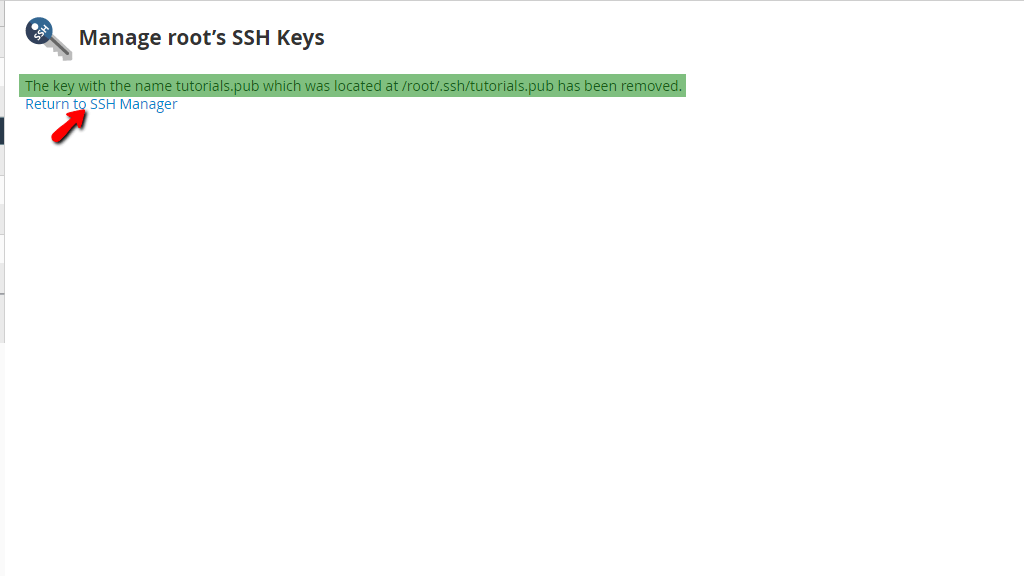
Upon pressing the link, you will be sent to the “Delete SSH Public Key” page and you will notice a red question asking you if you are sure and want to proceed. Please select the “Yes” link located below the question to delete the key.

When the “Yes” link is pressed, you will be redirected to a page notifying you that the key has been removed from the server, and underneath, you will see a “Return to SSH Manager” link that will bring you back to the initial “Manage root’s SSH keys” page.
Note that upon returning to the index page of the “Manage root’s SSH keys” feature, the private key will still remain active, despite the fact that you removed the public key.

Please follow the same process by clicking on the “Delete Key” link on the row of the key you want to delete inside the “Public Keys” table section.
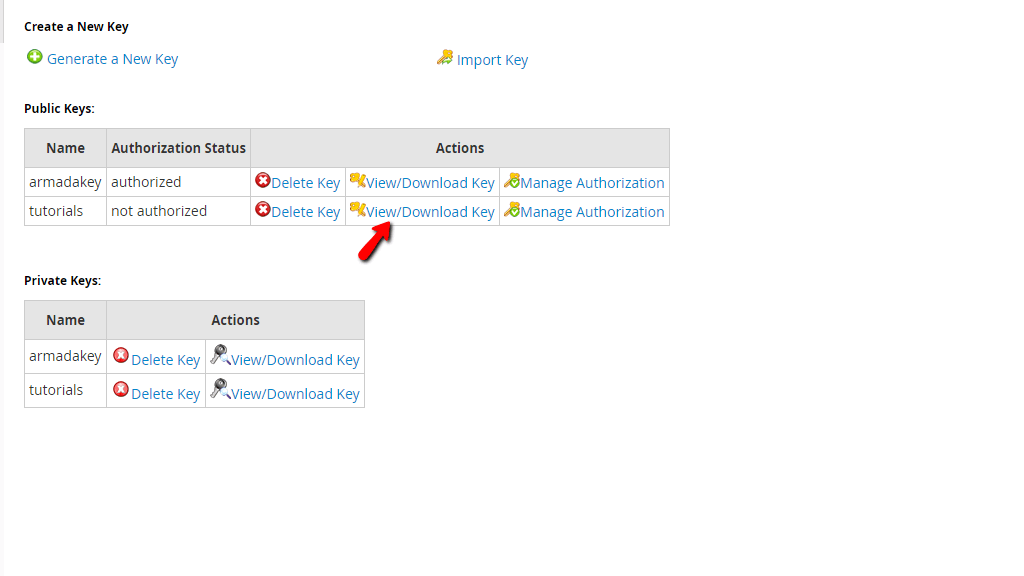
View/Download Key
This option will allow you to view or download either the public or private keys you created. In order to view or download the public key, please click on the “View/Download Key” link located on the row of the desired public key.
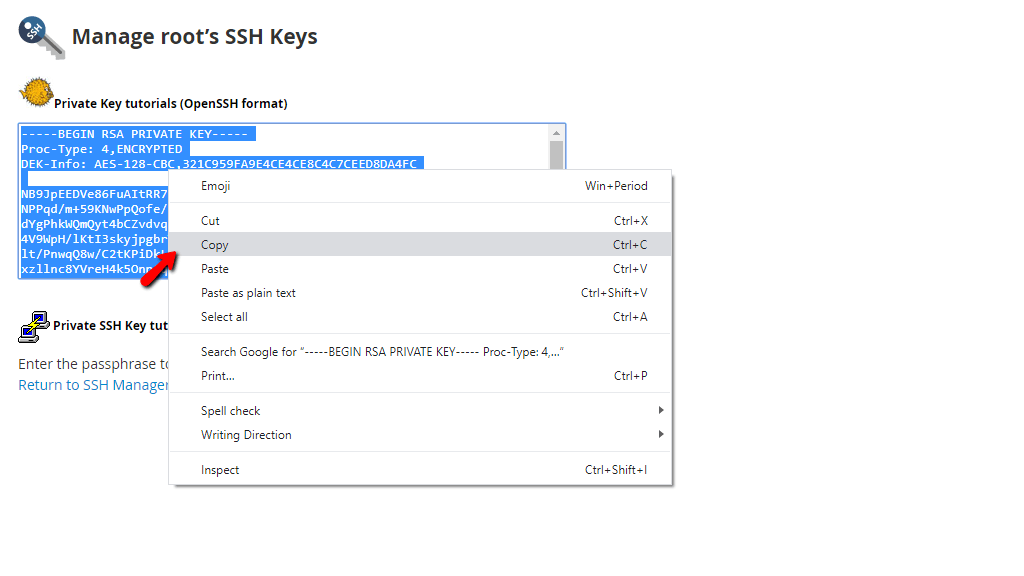
When you go to the “View/Download Key” page you will see a box and inside, the key itself. If you want to download it, please copy the content of the box and then save it on a file locally on your computer.
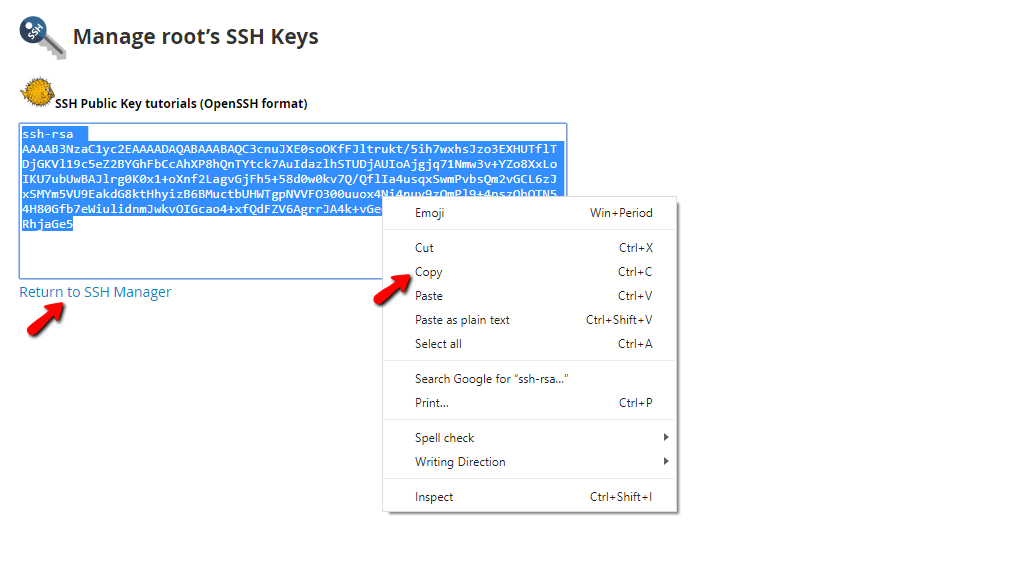
When you have done that, please press the “Return to SSH Manager” link on the bottom of the content box so you can go back to the initial “Manage root’s SSH Keys” page.
The process for the private key is similar. In order to view or download the key, please click on the “View/Download Key” on the row of the key you want to either view or download inside the “Private Keys” table section.
Similarly, you may copy this key from the content box and then paste it locally on your computer in a file.
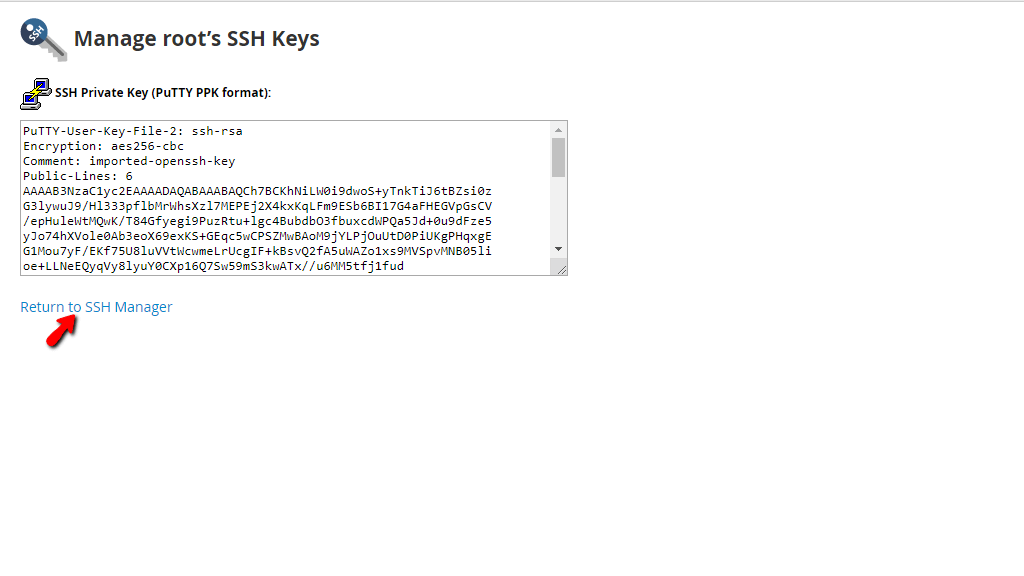
There is an additional option on this page that will convert this key into PPK format, which will then make it usable inside the “PuTTY” SSH client. However, in order to do that, you need the passphrase of this key, which was generated when it was created. Please type the passphrase inside the text field located below the content box where the key is and press the “Convert” button located on the right side of the text field.

Now that you have converted this key into a PuTTY PPK key, you may import it inside your SSH client and use it to authenticate. In order to return to the index “Manage root’s SSH Keys” page, please click on the “Return to SSH Manager” link on the bottom of the content box.
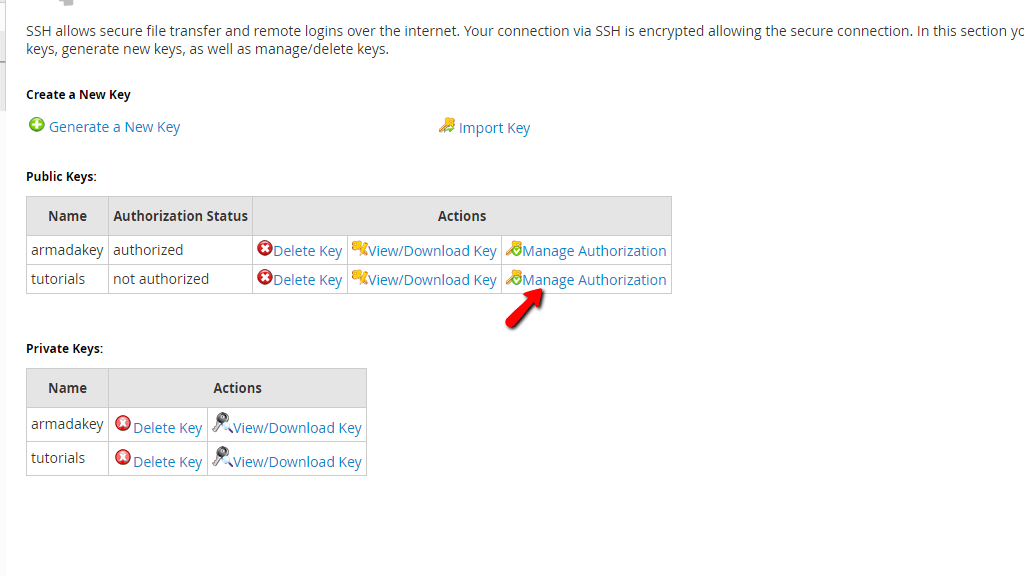
Manage Authorization
This option is only available for the public keys. In order to authorize the key, please click on the “Manage Authorization” link on the row of the key you want to authorize located in the “Public Keys” table section.
When you are redirected to the “Manage Authorization” page, you will see a blue “Authorize” button located on the upper side of the page. Please press it in order to authorize the selected key.
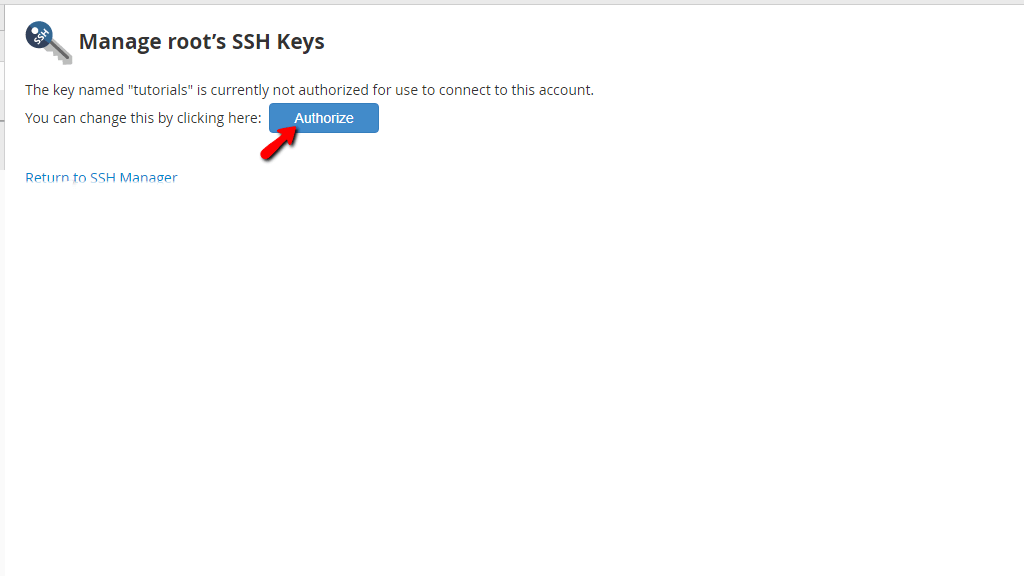
When you press the “Authorize” button, you will be sent to a page confirming that the key in question has been authorized. In order to return to the index page for the “Manage root’s SSH Keys”, please press the “Return to SSH Manager” link located under the confirmation text.

When you land on the index “Return to SSH manager” page, you will see that this key is now “authorized”
The last option we are going to discuss on the “Manage root’s SSH Keys” page is the “Import Key” option. If you have keys generated elsewhere that you would like to import into the WHM service so those can be used with your root user, you are provided with the option to "Import Key". To use that option please click on the "Import Key" button located on the far right side of the “Generate a New Key” link.
You will be redirected to a new page in which you will have to fill the following required fields in order for your key to be imported:
Once ready, please click on the "Import" button located at the bottom of the page.

If everything is filled correctly WHM will redirect you to a new page where a status message will be displayed. Typically if the key does not exist in WHM you will get a successful message, however in case you are facing any errors, please do not hesitate to check with our Technical Support Crew for further assistance on the matter.
The “SSH Password Authorization Tweak” is the second feature we will be talking about in this tutorial. In order to be redirected to the feature, please use the search bar on the left corner of the WHM control panel and type in “SSH Password Authorization Tweak”.

When the single result presents itself, please click on the “SSH Password Authorization Tweak” link to be sent to the functionality itself.
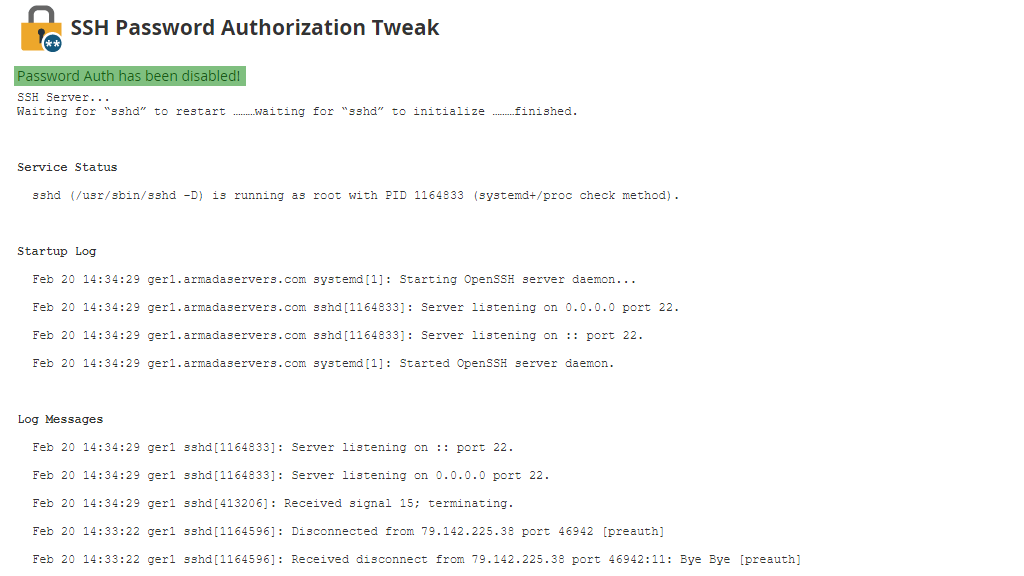
This functionality is very straightforward. Once you land on this page, on the top you will see a text notifying you about the current status of the password authentication on your server. By default, it is set to “enabled”, so that you may authenticate via SSH using a username-password combination.

In order to disable this option and allow your server to only accept authentication over SSH with a private-public key pair, please click on the “Disable Password Auth” button located beneath the current password authentication status text. Once the button has been pressed, you will be forwarded to a changelog page, informing you that the password authentication has been disabled.
Now, if you go back to the index “SSH Password Authorization Tweak” page, you will see that this status has changed to “disabled”. If you want to enable it again, please press the “Enable Password Auth” button located under the status text.

Again, this will show you a changelog, that states the password authentication is enabled once again.

That's it! Hopefully, this tutorial was able to teach you how to create SSH keys and use them to authenticate through SSH and how to disable password authentication for your server. For any questions or in case you face any issues in the process, please do not hesitate to contact our Technical Support Crew for further assistance and guidance.

Sebahat is a young and bright woman who has become an invaluable part of our team. She started as a Customer Care Representative, mastering that role and, along the way, growing into a tech-savvy individual who is well acquainted with every support layer of the company. Driven by her aim to improve our customers’ experience constantly, she is committed to enhancing the extraordinary support we deliver.
Learn more about WHM in the other tutorials that we have:
