
A Database is a collection of data structured in tables, rows, and columns used for storing information used by your website. In the general structure of the modern website, a Database is playing a key role and nearly 98% of the websites that we host on our network are using one or more Databases.
Often, interacting with the information stored in a database could lead to loss of data that is crucial for the operation of your website. In such situations, the only viable solution is to restore a backup of the damaged database and in the following lines of this tutorial, we will show you how easy it is to restore a database using the JetBackup 5 backup manager.
Before you can perform the restoration of a database you will need to configure the restore. To do that first you will need to access the JetBackup 5 backup manager. In case you are not sure how to do that, please make sure to read our JetBackup overview tutorial.
Assuming that you have accessed the “Dashboard” section of the JetBackup backup manager, please find the “Databases” option and click on it.
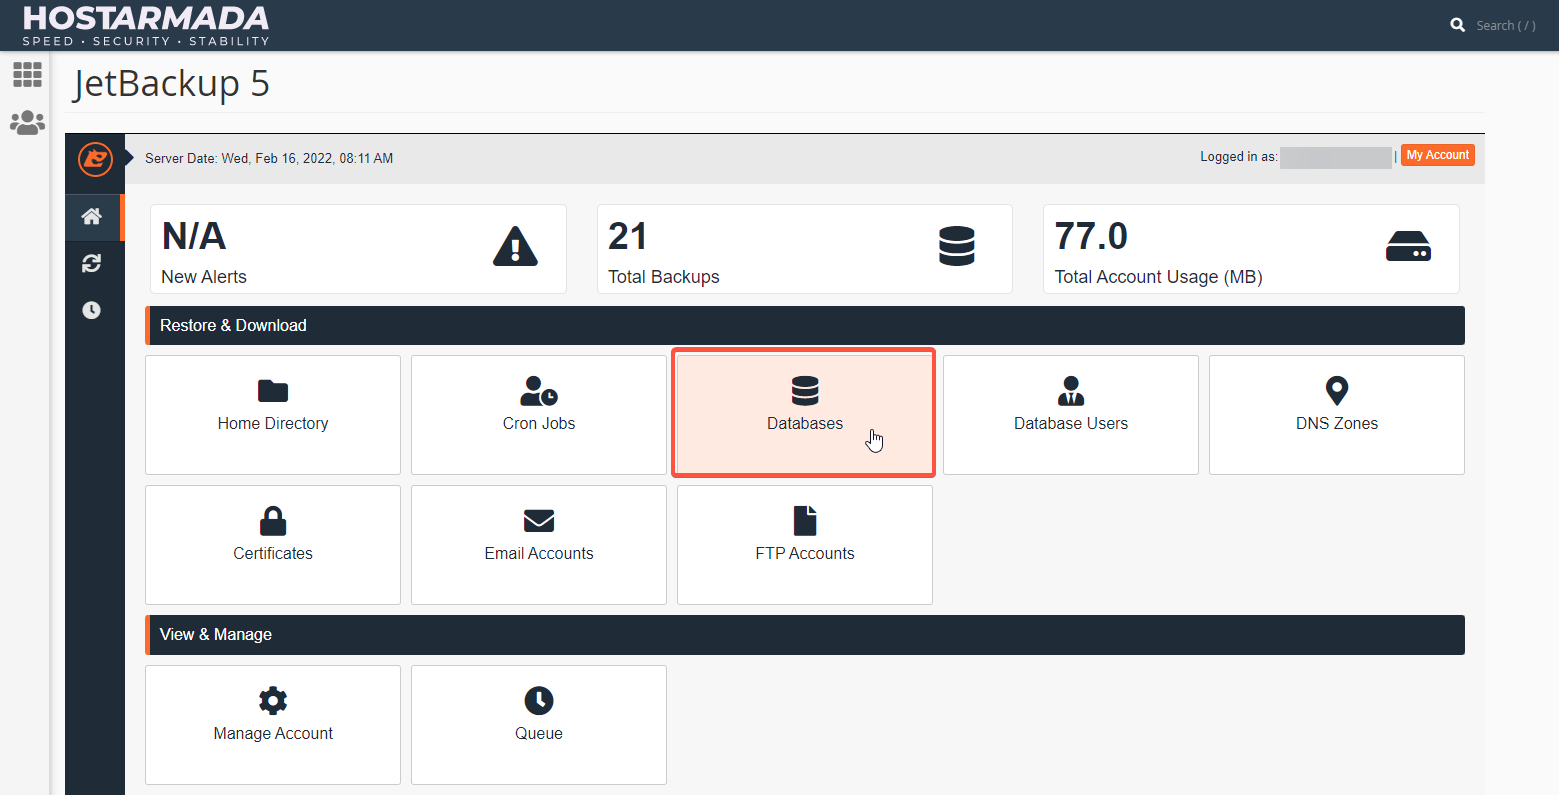
You will be redirected to a new page where you will see a convenient structure table-view with all the databases that you have created on your web hosting account. To proceed with the restoration you will need to figure out the name of the database your website is using. That can be easily achieved by looking into the configuration file for your website or by consulting with a developer who can find out the name of the used database.
Hint: For all WordPress users, the database name can be found in the wp-config.php file. The exact line can vary in number, however, you should be looking for the following piece of code:/** The name of the database for WordPress */define( 'DB_NAME', 'database_name' );Where, of course, “database_name” will represent the actual name of your database.
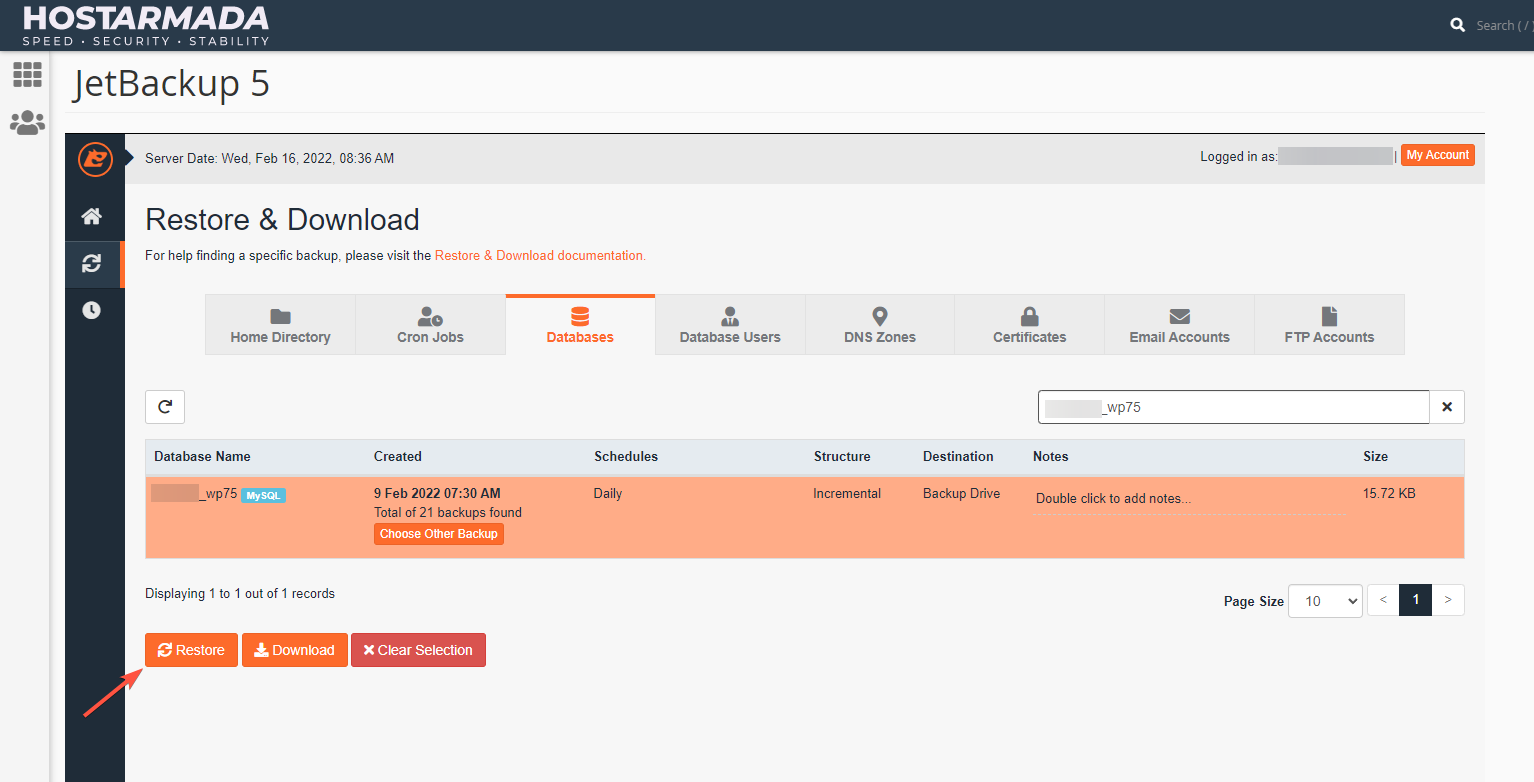
If you have the name of the database you should locate it in the list of databases. To ease that process JetBackup 5 provides a convenient search functionality located in the top right of the table view.
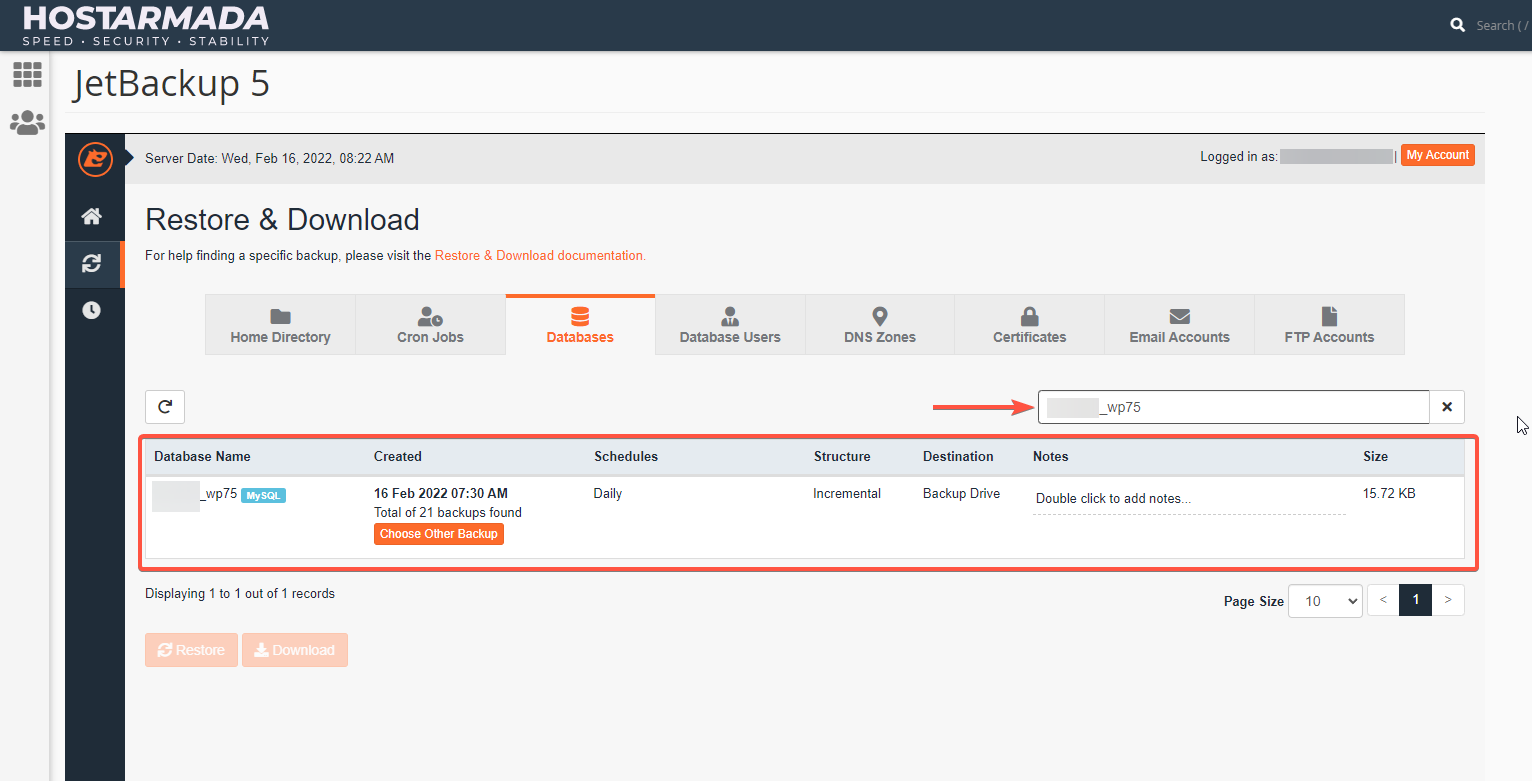
If you have located the database, you will also choose the date from which it should be restored.
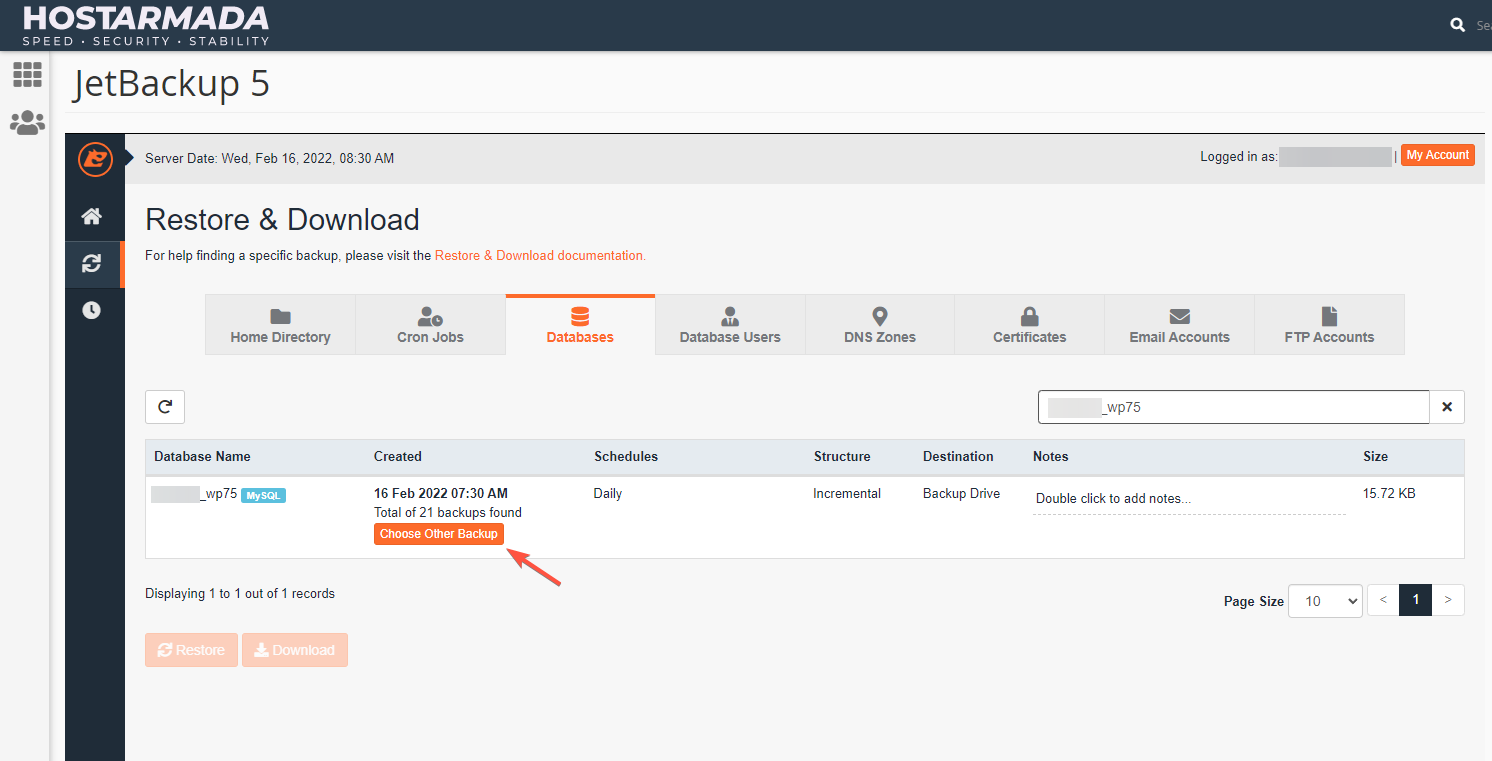
By default, JetBackup 5 will select always the most recent backup. If that is sufficient for you, please move to the next step skipping the content of this one.
However, if you need to restore an older backup you will need to tell that to the backup manager. To do that, please click on the “Choose Other Backup” option.
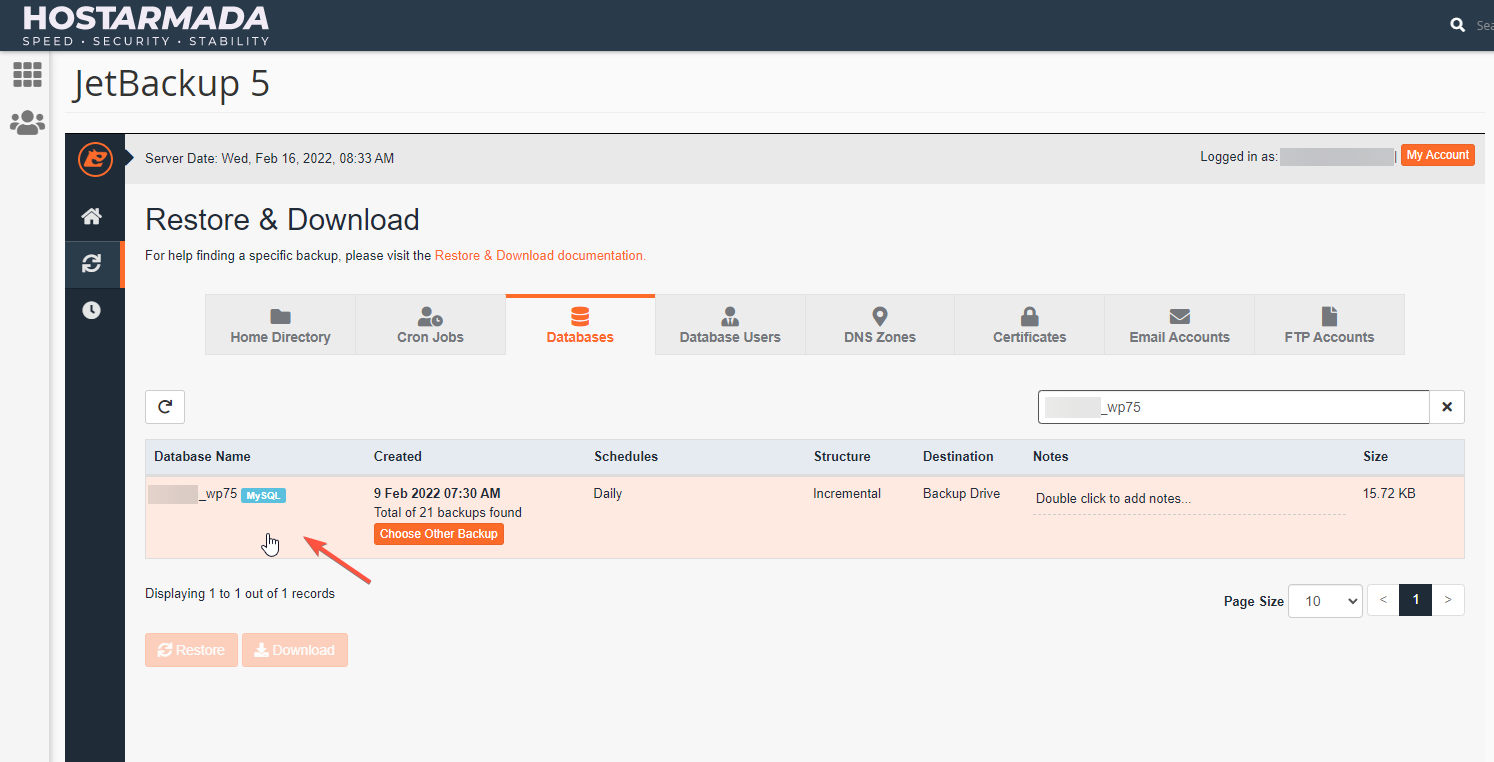
The button will then transform into a drop-down list containing all the backup dates for your database. Please choose the correct one from the list.
Finally, it is time to start the restoration process. To do that, please click on the row containing your database so it can become highlighted in orange.
Next, please click on the “Restore” button located at the bottom of the table.
The “Restore Summary” interface will appear and it will provide you with summarized information on the restoration you are about to perform. Please click on the “Restore Selected Items” button so the restoration process can start.

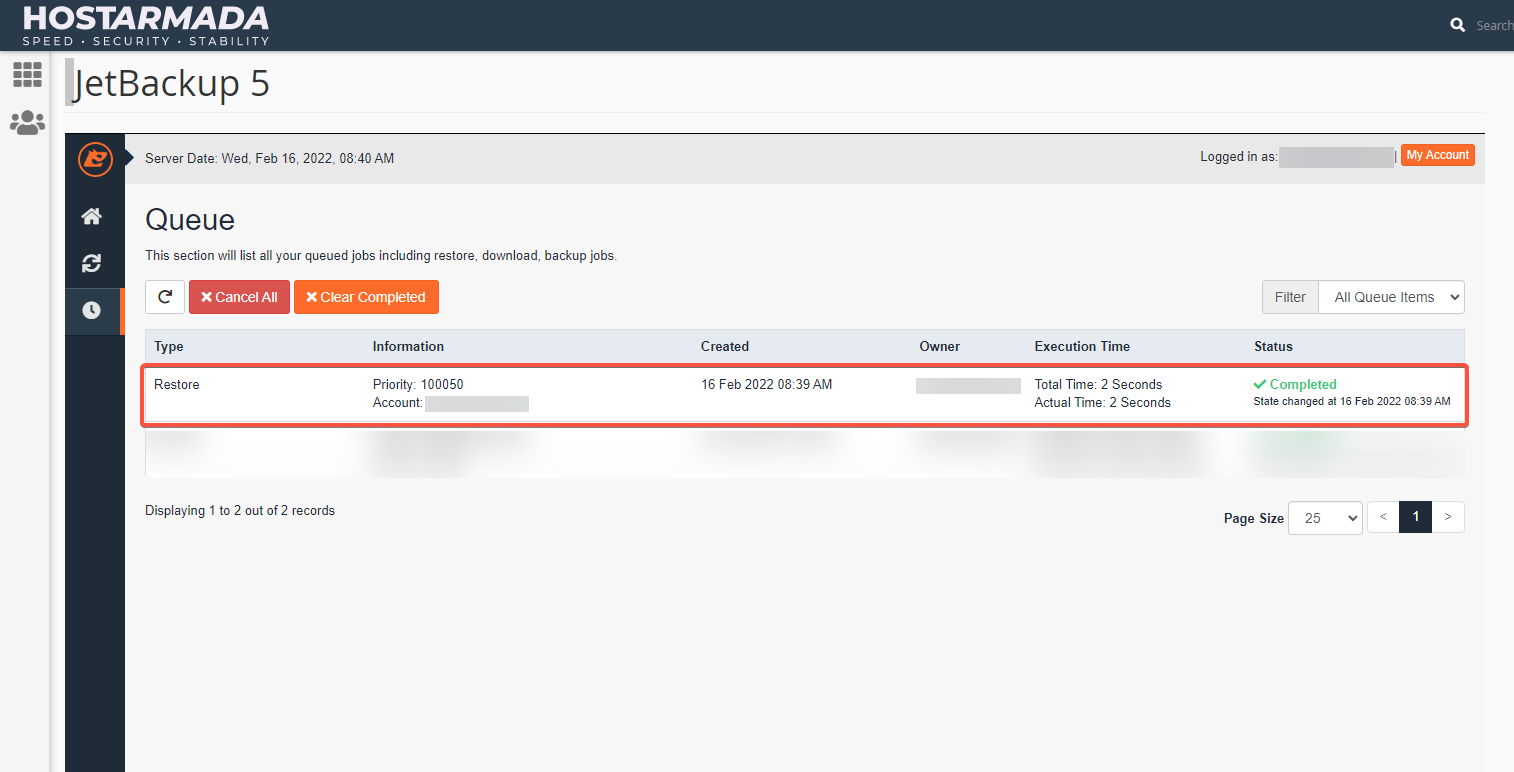
You will be redirected to the “Queue” page of the JetBackup 5 backup manager where you can monitor the progress of the restoration you have just initiated. When the restoration is completed the “Status” column of the table will indicate that with a “Completed” message highlighted in green color.
The restoration process can take some time depending on the size of the restored database. In case the process takes more than 1 hour, please check with our Technical Support Crew if the restoration is still ongoing.

Simeon is an experienced System Administrator with over 10 years of experience in the Web Hosting field. He is recognized unanimously as the man behind every technical innovation or improvement that HostArmada introduces. Adaptable and responsible, he solves every technical issue that we or our clients throw at him. Every so often you will find him publishing technical content on our website.
Learn more about cPanel in the other tutorials that we have:
