
If your website gets compromised or if a recent update is breaking the design and the functionality of the same, then perhaps the best course of action would be to restore a previous version where the website was fully functional.
The modern website today consists of files in which the source code is being stored. The files can be organized in folders or directly placed at the directory root of a domain. So in order to restore a previous version of your website, you will actually need to restore its file and folders.
JetBackup 5 provides quite a convenient tool to help you out when you need to restore any of the files for your website or for your web hosting account in general. Here is how you should use it.
Please access the JetBackup 5 feature via the cPanel service for your web hosting account and from the “Dashboard” section, please click on the “Home Directory” option.

You will be presented with a table view containing all the backups for the files of your web hosting account. Please find the date from which you would like to restore the files and click on it.

The backup will be highlighted in orange which means that you have selected the same for restoration.
To restore only specific files/folders you will need to select those. To do that click on the “Change File Selection” button:

This will bring up the “Select Files” interface where you can tell JetBackup 5 which specific files or folders you would like to have restored.

Important: Each domain name is associated with a folder within your web hosting account. The primary domain will always store its files in the public_html folder, while the subdomains and addon domains will have their own separate folders typically store outside the public_html folder. To find out the folder for each subdomain/addon domain you will need to access respectively the Addon Domains and Subdomains features of cPanel and check in the list of items the folder for each Addon Domain or Subdomain you would like to restore.
When you locate the files or folders you would like to restore, you will need to select these by clicking on the small checkbox in the first column of the table. After all the files/folders you would like to restore are selected, please click on the “Select Files” button.
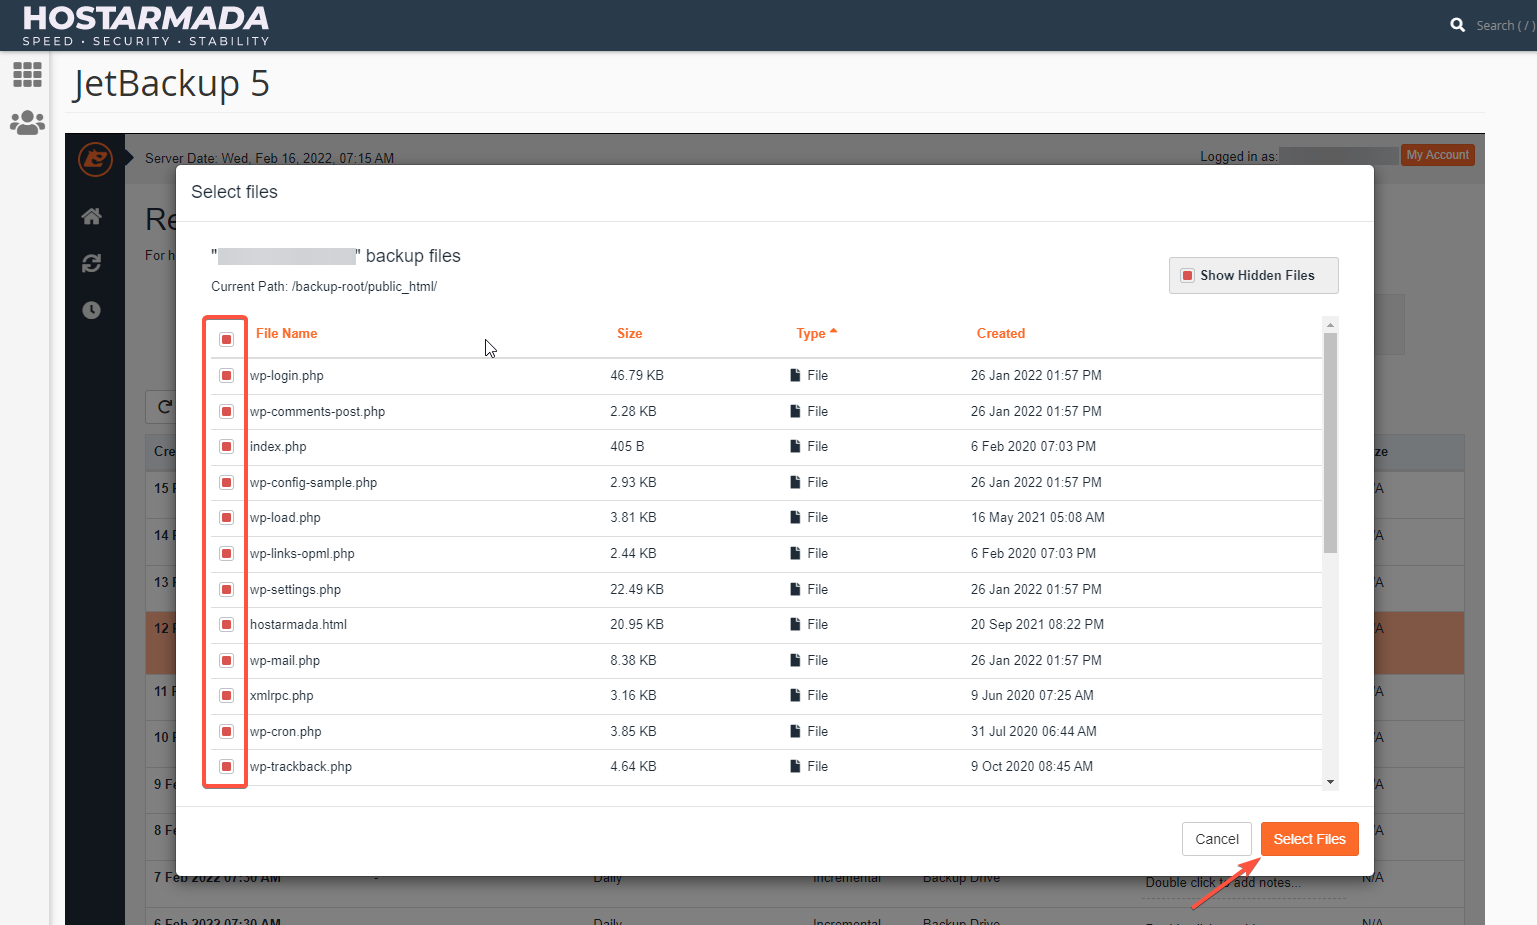
The “Select Files” interface will be then closed and you will be presented once again with the table of available backups.
Now, please click on the “Restore” button at the bottom of the page so the restoration process can begin.

The “Restore Summary” interface will appear. In it, you will have the option to review the summary of the files you are about to restore. If you erasure that you would like to restore the files, please click on the “Restore Selected Items” button so the restoration process can begin.

You will be redirected to the “Queue” section of the JetBackup 5 interface where you can monitor the progress of the restoration process. When the restoration is finished the Status column of the table will show a green “Completed” text.
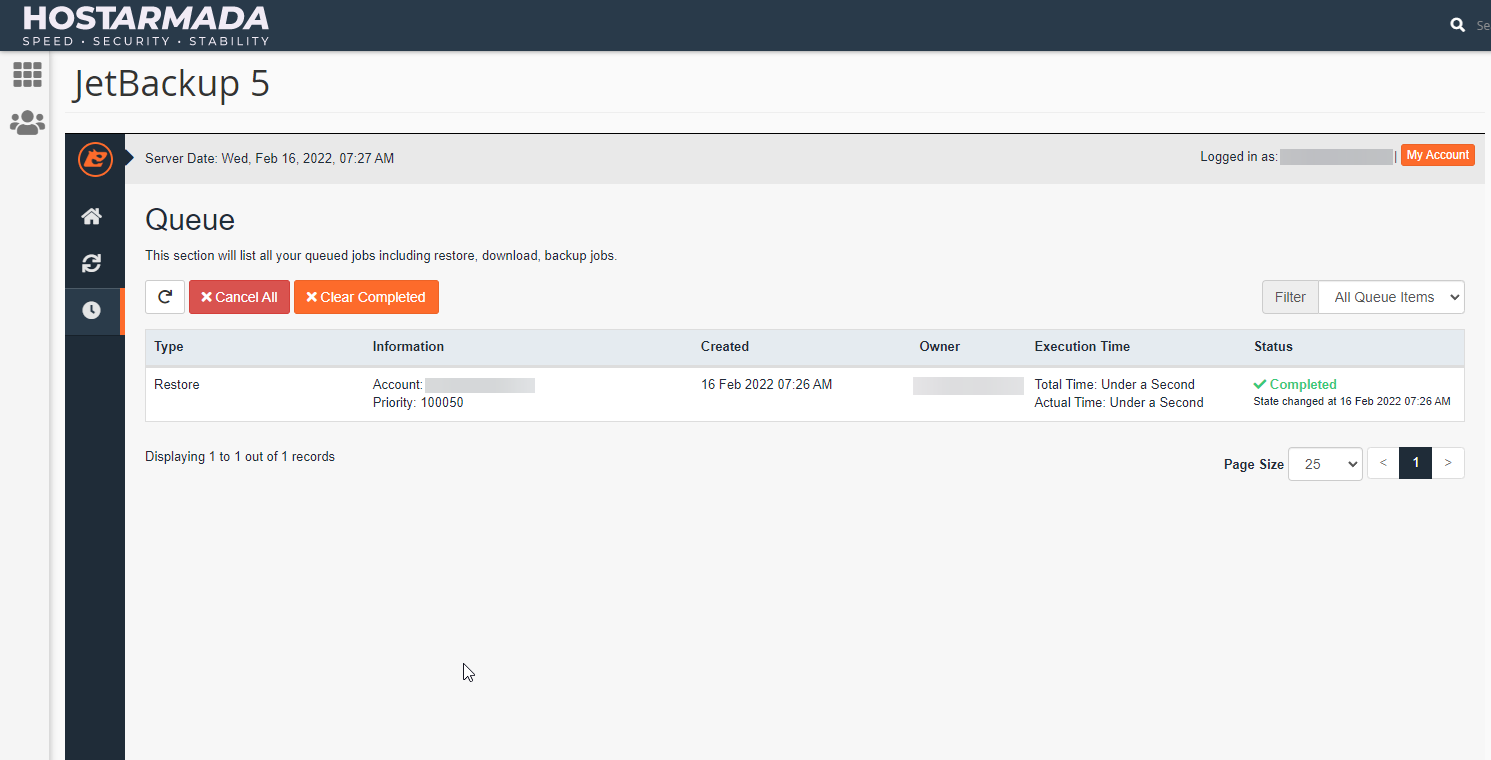
The restoration process can take some time depending on how many files are you restoring and also on the size of those. In case the process takes more than 1 hour, please check with our Technical Support Crew if the restoration is still ongoing.

Simeon is an experienced System Administrator with over 10 years of experience in the Web Hosting field. He is recognized unanimously as the man behind every technical innovation or improvement that HostArmada introduces. Adaptable and responsible, he solves every technical issue that we or our clients throw at him. Every so often you will find him publishing technical content on our website.
Learn more about cPanel in the other tutorials that we have:
