
SSH is a network protocol used to send commands of files to a remote server. The SSH protocol follows the client-server model of communication meaning that to connect to the SSH service running on a server you will need an SSH client. The main advantage of SSH over the other communication protocols is that it encrypts the communication using cryptographic keys algorithms so no matter if the communication is handled over an insecure channel it will still be encrypted.
The SSH protocol requires authentication. The most basic form of authentication is using username and password, however, SSH provides another authentication method - authenticating with a cryptographic key. Actually, there are two types of keys - public and private keys. To generate these keys typically you will need access to the SSH service, however, cPanel makes it easy for you by providing you with an interface where you can generate the required keys. When a key is generated, cPanel will create for you both the public and the private key. The public key is saved on the server while the private key you will need to download and then import into your SSH client. When you attempt to login over the SSH protocol both the public and the private key are compared and if they match you will be able to authenticate successfully.
Now that you know how SSH works, let's continue reviewing the "SSH Access" feature of cPanel.
Before you can access any of the features that cPanel has to offer you will first have to log in to the control panel. To do that please follow our tutorial "How to access the cPanel service?".
Once you are logged in to the cPanel service, you should see a list of all the features separated into different feature groups. To access the "SSH Access" feature you will need to either use the search functionality displayed at the top of the page or you can look for the "Security" group of features since there you will find the "SSH Access" feature.
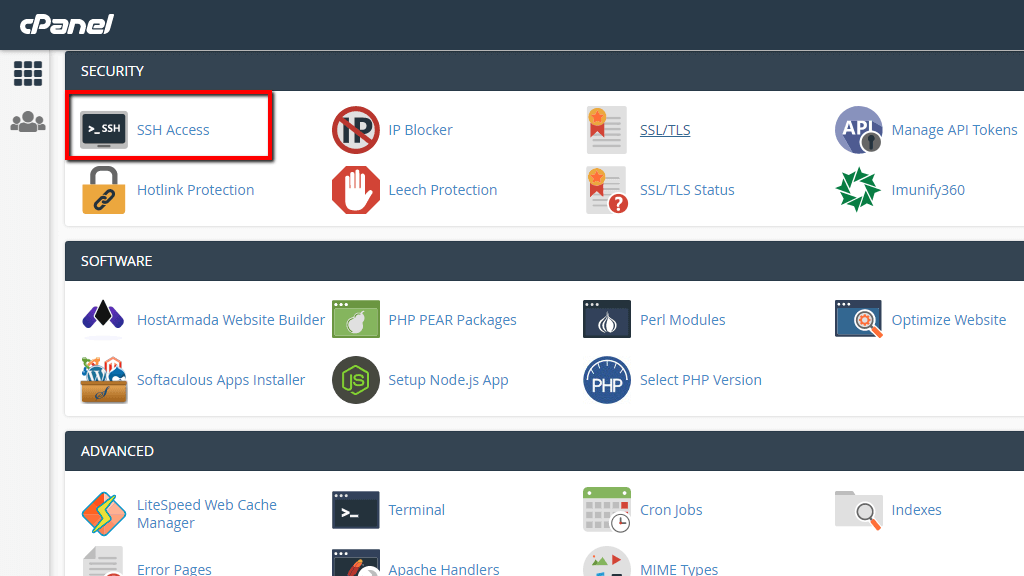
Clicking on the feature will take you to its default page where you will find additional information related to how the feature works.
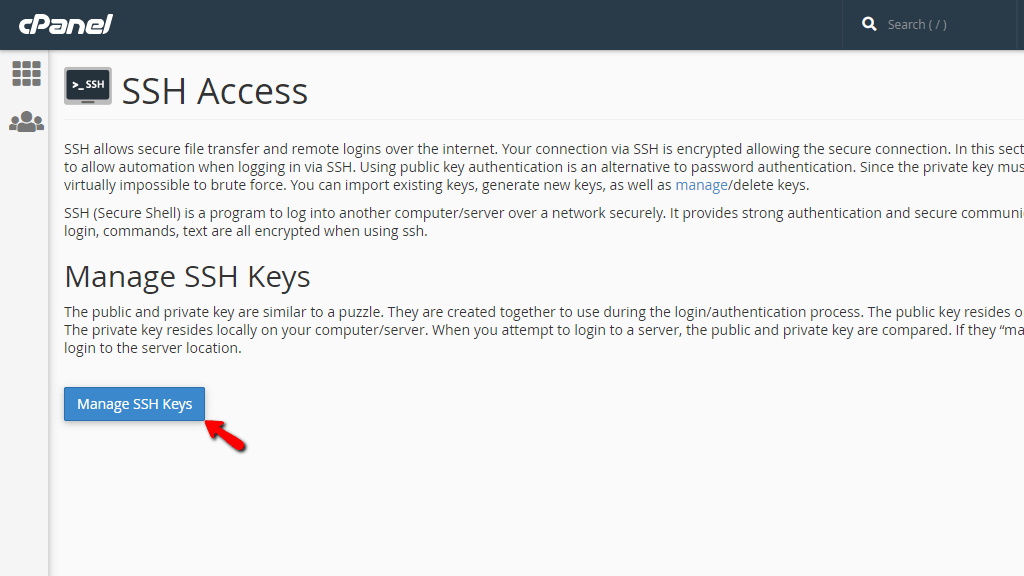
To generate a new SSH key you will need to click on the "Manage SSH Keys" button from the default page of the "SSH Access" feature.
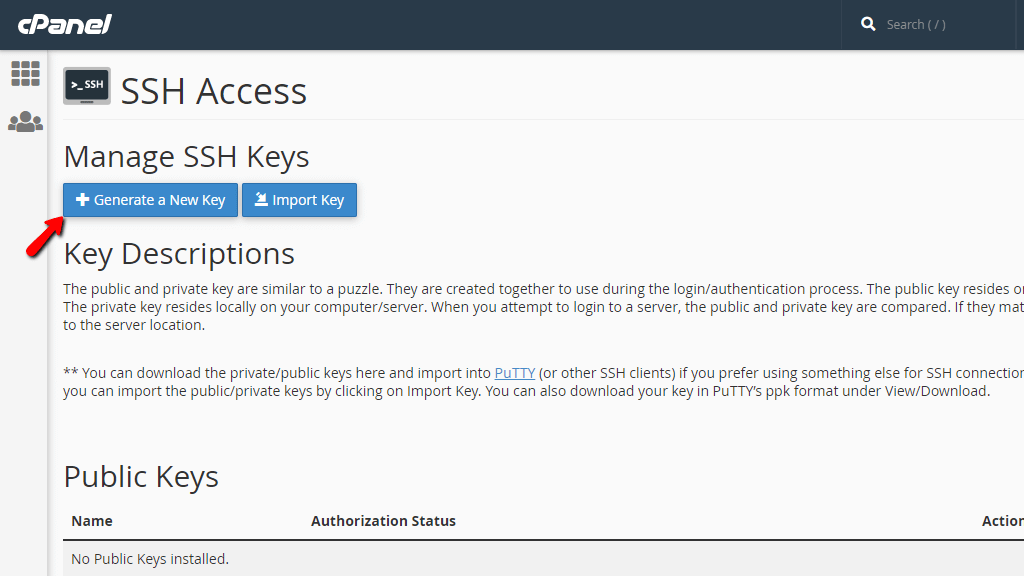
You will then be redirected to a brand new page on which you will be able to perform different actions related to the SSH keys.
Let's generate a new SSH key. To do that, please click on the "Generate a New Key" button.
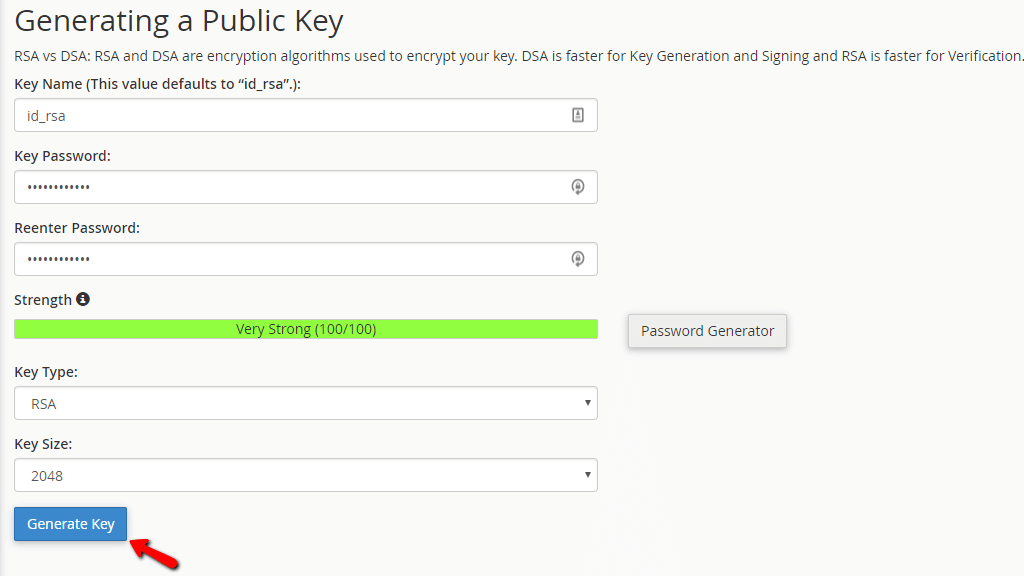
This action will redirect you to a brand new page where you will have to fill in certain information about the generated key. Let's see what fields you will have to fill.
Once you are ready, please click on the "Generate Key" button so cPanel can start generating your brand new SSH key.
cPanel will then redirect you to a brand new page in which it will provide you with general information about the key's generation process. Please click on the "Go Back" link at the bottom of the page so you can be redirected back to the default page for the SSH keys.
Now that your key is generated it is time to authorize it. The authorization process is simply activating the key. Without the key being activated it cannot be used so let's activate the newly generated key. To do that please click on the "Manage" link for the chosen SSH key.
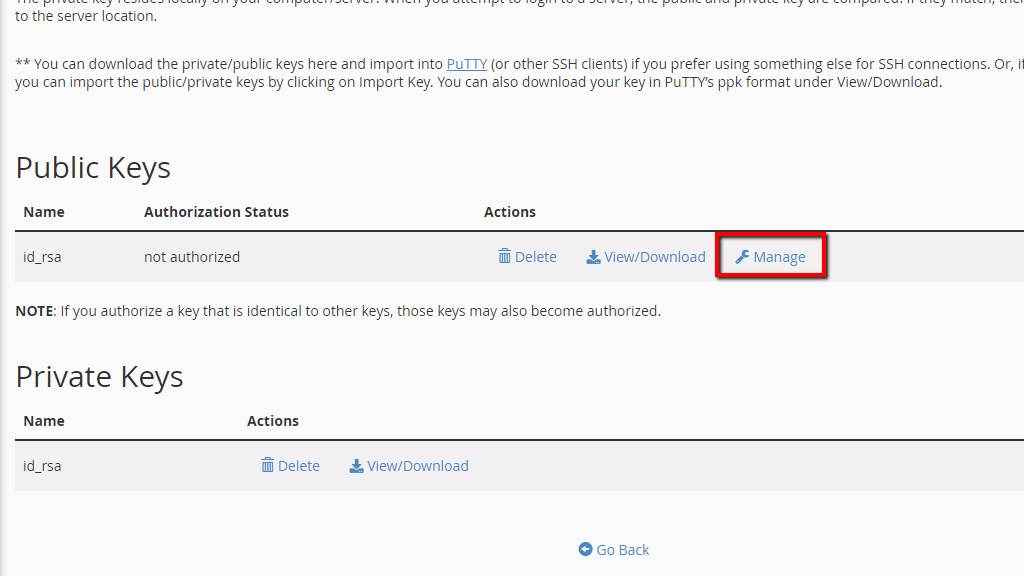
You will be redirected to a new page where the only option you will have will be a single "Authorize" button which you will need to click in order for the chosen key to be activated.

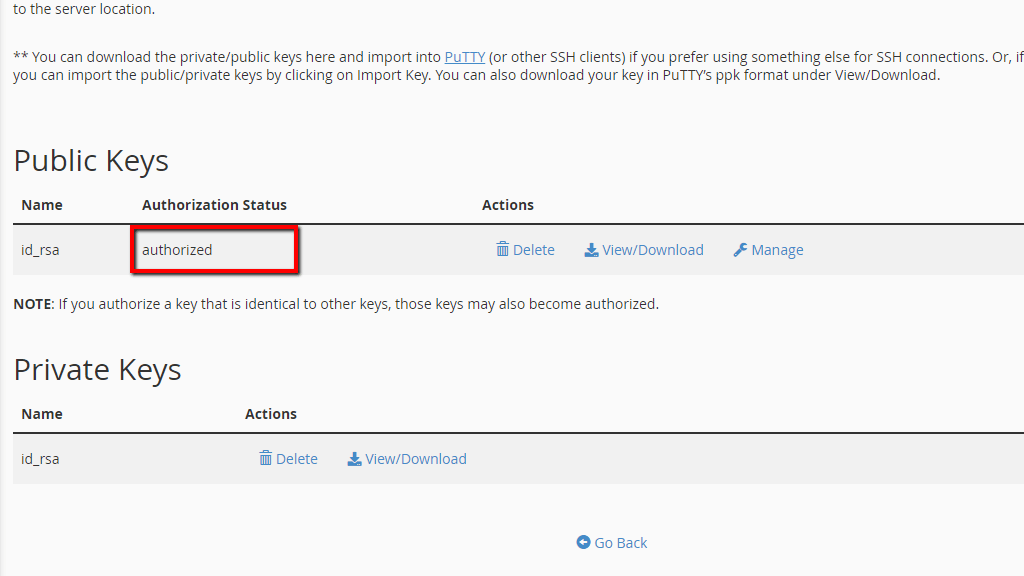
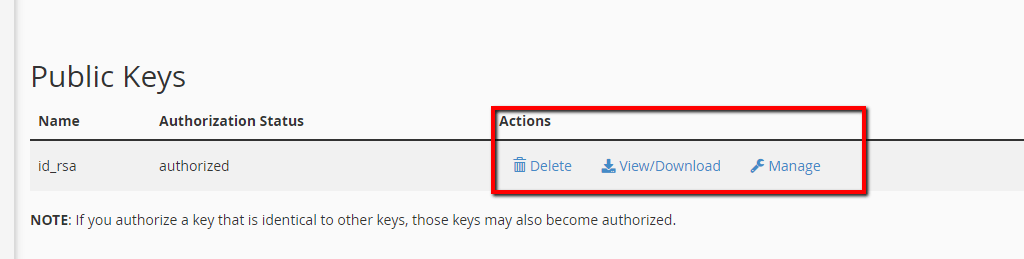
cPanel will redirect you to a new page where a success message should be displayed. Going back to the default page for managing your SSH keys you should see that the key's "Authorization Status" should be now "authorized".
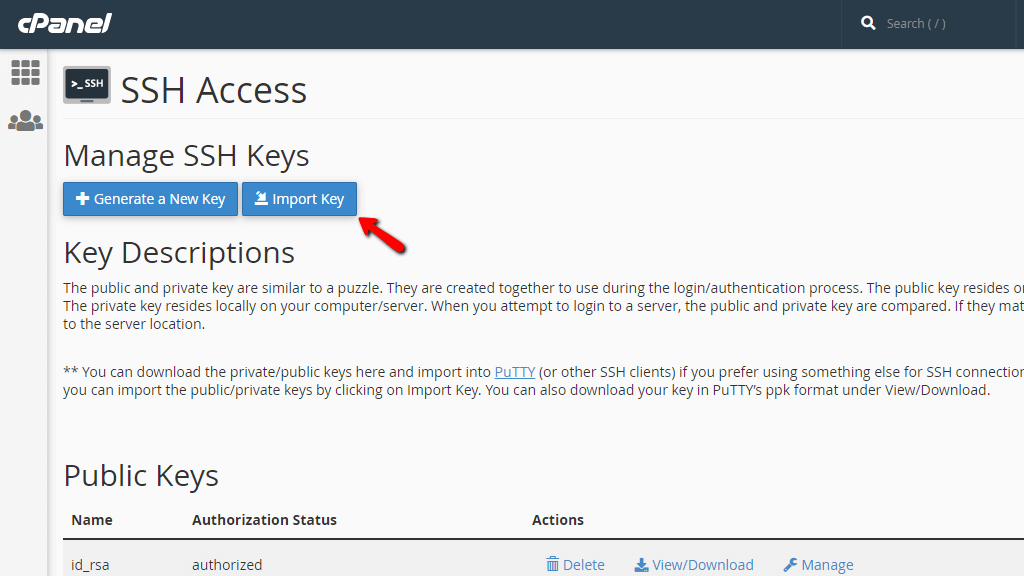
If you have keys generated elsewhere that you would like to import into the cPanel service so those can be used with your cPanel account, you are provided with the option to "Import Key". To use that option please click on the "Import Key" button located at the top of the page right next to the button "Generate a New Key".
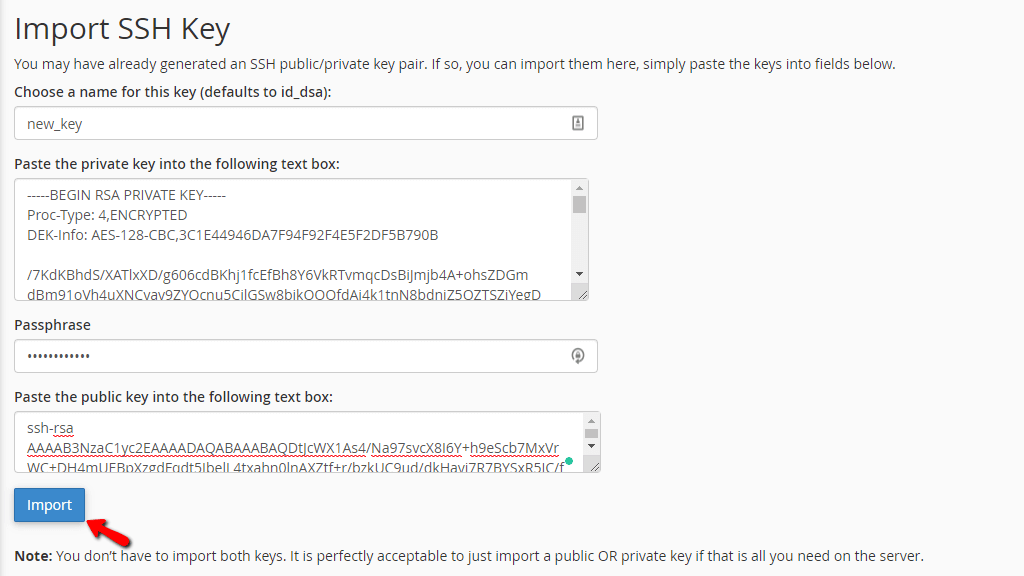
You will be redirected to a new page in which you will have to fill the following required fields in order for your key to be imported:
Once ready, please click on the "Import" button located at the bottom of the page.
If everything is filled correctly cPanel will redirect you to a new page where a status message will be displayed. Typically if the key does not exist in cPanel you will get a successful message, however in case you are facing any errors, please do not hesitate to check with our Technical Support Crew for further assistance on the matter.
Now that you have created an SSH key, it is time to review what management actions you can perform with it. As we have mentioned a generated key consists of two keys actually - public and private. On the default SSH keys management page, you will be presented with two additional sections for managing your SSH keys.
The first section is called "Public Keys" and in it, you will find all the Public Keys generated by cPanel so far. For each of the keys you will be able to perform the following Actions:
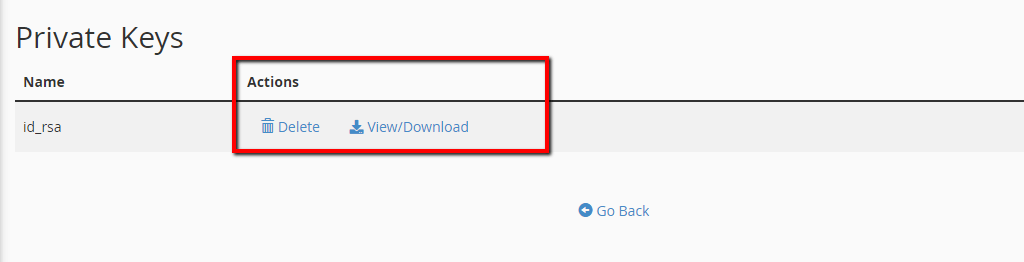
The second section is called respectively "Private Keys" and in it, you will find all the private keys you have generated. The management actions you can take with each of your private keys are as follows:
Being aware of the offered management functionalities is critical when using your SSH keys.
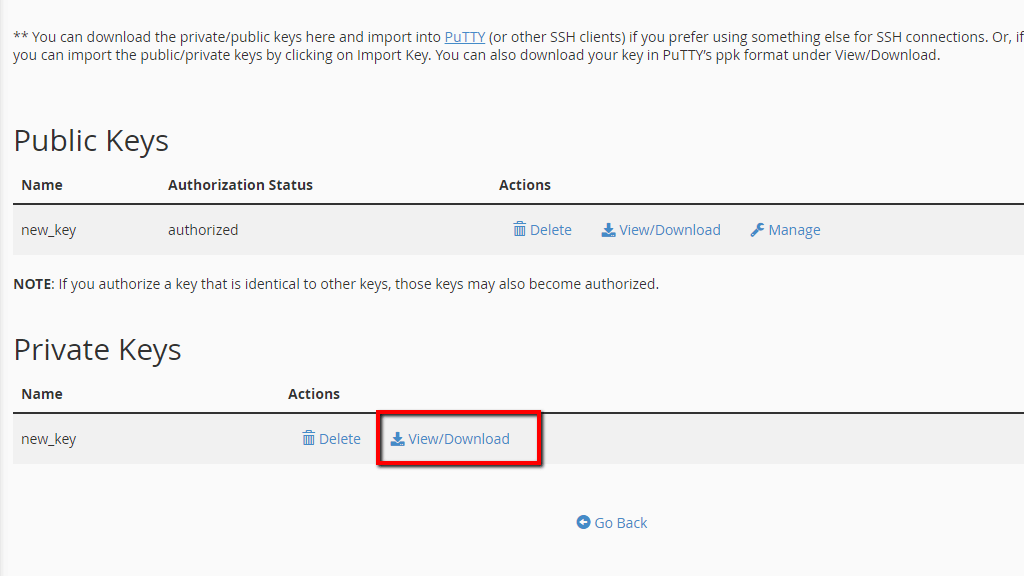
Finally, we will show you how to import your SSH keys into the PuTTY SSH client. When you install PuTTY you will get a few useful tools along with it. To start importing your keys first you will need to download the Private key from cPanel. To do that, please click on the "View/Download" link next to the private key you would like to download.
cPanel will then redirect you to a brand new page where the private key will be displayed. Please click on the "Download Key" button so your key can be downloaded on your local computer.
Next, you will need to open the "PuTTYgen" application which will be provided after installing PuTTY. In it, you will need to access the "File" -> "Load Private Key" menu.

Then you will need to select the downloaded key from the file system of your local computer. Typically it should be in the Downloads folder of your Web Browser. Another important thing to note here is that by default PuTTYgen will limit the displayed files for selection to only ppk file types. However, the downloaded key is not in such a file format so you will need to select the option for all file extensions to be displayed. Only then you will be able to see the downloaded key and select it.
If the selected private key has a passphrase PuTTYgen will ask you about it, so please make sure that you have the correct passphrase in hand.
Finally, the key will be imported and PuTTYgen will indicate that with an appropriate message.

To finalize the process, please click on the "Save private key" button. This button will attempt to save the key into the ppk file format, so please pick a location for the key to be saved and further retrieved if necessary.

Once the key has been saved you can close the PuTTYgen application and open the PuTTY SSH client. In the "Category" section you will need to access the "Connection" -> "SSH" -> "Auth" section.

This will display the options for controlling the SSH authentication in PuTTY and now you will need to import the key you have saved from the PuTTYgen application. To do that, please click on the "Browse" button, and then please select the key you have saved from the PuTTYgen application.
When you import the key, please do not click on any of the buttons but instead please access the "Session" category of settings.

There you will need to configure the "Host Name (or IP address)" of the server you would like to connect to and also the SSH Port. You can obtain that information via the "My Services" section of the HostArmada Client Area. Finally, please click on the "Open" button so PuTTY can open the connection to the specified server.

You will be asked to enter the username and here you should actually input your cPanel username. Then, if the key you have used has a password you will be asked to specify the password for this key and finally, you will be logged in to the SSH service for your Web Hosting Account.

That's it! We would like to congratulate you on reading this whole tutorial. We hope that you have learned how easy it is to perform a secure connection to the SSH service of your HostArmada Web Hosting Account. For any questions or in case you face any issues in the process, please do not hesitate to contact our Technical Support Crew for further assistance and guidance.

Sebahat is a young and bright woman who has become an invaluable part of our team. She started as a Customer Care Representative, mastering that role and, along the way, growing into a tech-savvy individual who is well acquainted with every support layer of the company. Driven by her aim to improve our customers’ experience constantly, she is committed to enhancing the extraordinary support we deliver.
Learn more about cPanel in the other tutorials that we have:
